Friday, December 31, 2010

Bee Happy New Year

Happy New Year!!

I hope that you have a wonderful start to 2011.  Are there any goals that you have for yourself??  I want to be taking better care of myself, spending more time with my kids (they are only little once), and as far as paper crafting, I want to try to submit more for publication.  I do have a couple of projects that are being published this month in the Cricut Magazine as well as a card in the Bug Magazine.  I will share them with you when they are out in print and I know that I have permission.  Here is a card that I was thinking of submitting, but I think that I will share it with you today for the new year.  I used the current challenge at CPS for this card.  I went with sketch 166.


    Supplies:
        Cardstock: Stampin' Up! (white, black, yellow), Bazzill (pale blue)
        Die cuts: Cricut with Walk in my Garden cartridge
        Vellum: Stampin' Up!       
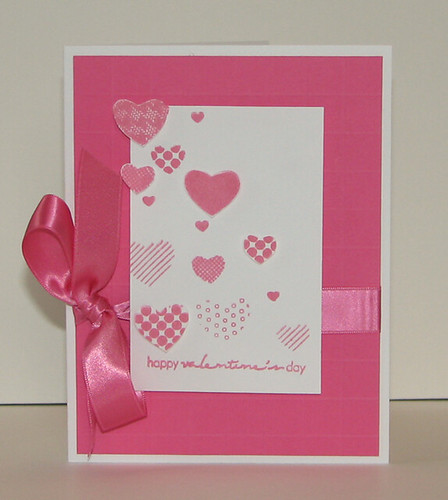
        Ribbon: Stampin' Up!
        Punch: Stampin' Up!
        Pen: Zig
        Ink: Colorbox Fluid Chalk

I want to wish you all a happy and crafty new year!!  Thanks for stopping by and for your continued visits and comments.  I really appreciate them.  ♥

Hugs,

Wednesday, December 29, 2010

My Favorite Cards In 2010

As the year 2010 is drawing to a close, I thought it would be fun to share with you my favorite cards from this year.....one for each month.  There were a couple of months I had a hard time choosing a favorite, but I just went with the ones that stood out the most to me.  So, without further adieu, I will share them with you......
(You can click on the card to be taken directly to the post for the card if you would like additional details)

January:
I absolutely love the peacefulness of this card.

February:
I love the way that this card turned out.  I crocheted the flowers myself.

March:
I love the way this card makes me smile when I look at it.

April:
This one is my favorite of all the masculine cards I have ever made.

May:
This card took quite a bit of time to assemble and I absolutely love the results.  I think this is the most artistic card I have ever done.

June:
I love the crispness of the white and the beautiful colors in this one.

July:
I just adore this cute owl card.

August:
Here are some of the mini cards I made in the summer.  Truly one of my favorite sets of cards.

September:
I just love how this card came to be.  I wasn't sure what I was going to do when I started it and I am so pleased with the outcome.

October:
This is a card that I created for the JustRite blog hop.  I love the little scallops peeking out and the embossed background....the bakers twine also adds the perfect touch.

November:
I had to put my favorite movie card up.  It was created from the Cinema Saturday Creative Challenge for Pride and Prejudice.

December:
I love using non traditional and themed papers when I make my Christmas cards and the sparkle on these trees is fabulous.

Do you have any favorites?? I would love to know which of my cards you liked the best and also what are the ones you created this year that are your favorites??  I would love to see them....share the link with me under this post.

Hugs,

Monday, December 27, 2010

Celebrate the Season - Winter Frame

How was your weekend??  Did you celebrate with family and/or friends??  Now that we are though the holiday rush, hopefully we can have some more time to craft.  I know that my scrapping room needs some cleaning.  I have been creating projects for family and friends without much time to clean up the mess, so this week, I am going to spend a little time getting things cleaned up and better organized so that I can start the new year fresh.  Today, I am sharing a project with you that I created from the Winter Lace cartridge that ScrapbookPal sent me to work with.  I created this frame that I gave as a gift on Saturday.
I bought an 8 x 8 shadowbox frame from Michael's.  It was black and I didn't want it to be black for this project, so I taped up the glass and spray painted it with some sliver spray paint.  Here is how I completed the rest of this project:
  • Cut the background piece to 8 x 8 from a light colored turquoise cardstock.
  • Cut 9 different snowflakes from the Winter Lace cartridge at 1 3/4 inches with some white cardstock (I used a pearl finished cardstock for my cuts).  Cut the background layer out of a darker turquoise cardstock and adhere the snowflakes to their background pieces.
  • Draw a line with a black pen about one inch inside each edge of the background cardstock for a border (leaving the bottom open for a sentiment).  I used a sticker sentiment from SRM for the bottom border.  Attach this to the inside of the back piece of the frame.
  • Add silver brads to each side of the sentiment and little ones to the center of each snowflake.
  • Arrange the snowflakes inside the black maker border as shown above.  Layer with dimensional adhesive.  I stacked two pieces of dimensional adhesive under each snowflake.
  • Assemble the frame.
      Supplies-
        Cardstock: Bazzill (background), Wausau (snowflakes)
        Die cuts: Cricut Expression with Winter Lace Limited Edition cartridge
        Sticker: SRM Stickers
        Brads: Making Memories
        Pen: Zig

I hope that you have a happy and crafty New Year!!
Hugs,

Thursday, December 23, 2010

December Bigger Than A Bread Box Kit With Apron Strings Designs

Seasons Greetings and Merry Christmas!!  I can't believe that it is just a two days away.  I still am working on a few projects that I need to get completed today, as well as some grocery shopping for the weekend.  I wanted to share the layouts and cards I designed with the December Bigger Than A Bread Box kit for Apron Strings Designs.  I had lots of fun with the beautiful papers and embellishments in this kit.

This first one is from the Basic Grey Jovial collection:


And here is a quick card I created with the scraps:

These are from the October Afternoon line:


And here are the cards I made from the scraps:

If you would like to grab one of these kits for yourself, hop on over to the Apron Strings Designs website or click HERE and get it before they sell out.

Here is wishing you and yours a VERY MERRY CHRISTMAS!!

Monday, December 20, 2010

Guest Designer Announcement - Peachy Keen Stamps

I am way excited to announce to you that I have been selected as a guest designer for Peachy Keen Stamps.
I Love my Peachy Keen Stamps
I have been so excited to share this information since I found out last week, but I had to wait until the announcement on the Peachy Keen Blog today to share it with you.  I will get to design with some of their stamps and post my projects to the Peachy Keen Blog for the week of July 11-15, 2011. I will also get to give away a set of Peachy Keen Stamps from the comments that are left here on my blog posts for that week.  I would like to thank you all for visiting my blog and for the wonderful comments you leave for me.

If you would like to check out the list of the other amazing guest designers for the 2011 year, hop on over to the Peachy Keen Blog.

Hugs,

Saturday, December 18, 2010

Glittery Christmas Cards

Christmas time is almost here.  Are you all ready??  I am done with shopping and I have a few things that I am making for family that I need to finish up, but other than that, I am all ready.  I do apologize for not posting more lately, but I have been busy with Christmas projects and celebrations and my scrapping room has been a little neglected lately.  It felt great to get down there yesterday and make a couple of cards.

I used CPS Sketch 197 for these card as well as the Glitter Is Glam Challenge at Moxie Fab World.


        Cardstock: The Paper Company (kraft), Stampin' Up! (blue), Bazzill (white)
        Patterned paper: Provo Craft  - Rob & Bob Studios
        Die cut: Cricut Expression with Stretch Your Imagination cartridge
        Sticker: SRM Stickers
        Glitter: Stampin' Up! (chunky green), Stickles (yellow)
        Other: Button, hemp twine, dyed seam binding

Sorry about the poor pictures.  We haven't really seen much of the sun lately and so I had to rely on artificial lighting to get these shots.  I have some new projects that I did with the Bigger Than A Bread Box December kit from Apron Strings Designs that I will be posting in the next couple of days.  Stay tuned!!

Hugs,

Saturday, December 11, 2010

Winter Gift Tags with ScrapbookPal

Today is my day to share a project on the ScrapbookPal blog

Brrr....it has been so cold outside lately.  Just before Thanksgiving, we dropped to below freezing in the area that I live in Northern Utah and we received over 2 feet of snow at my house.  I hope that you are all staying warm in the northern hemisphere....I am going to go and snuggle by the fire with my kids and drink some hot cocoa.  Today I am sharing some tags that I made with my Cricut and the Winter Lace cartridge from ScrapbookPal.  Did you know that ScrapbookPal has a fabulous selection of Cricut cartridges for the crafter on your list?  They also offer free shipping on all orders over $25 and they ship quickly.

I made up these fun winter tags to go along with the yummy homemade goodies that my kids and I are making for our neighbors.  I used the Winter Lace Limited Edition Cricut cartridge for the snowflakes and the Wrap It Up cartridge for the tags.  You can use the tags on many of the cartridges that are out.  To make some tags like mine, here is what you will need to do:
  • Cut out several tag shapes at 4 1/2 inches.  I was able to get about eight tags on one page.  Ink the edges and add some hand drawn stitches around the edges.
  • Cut out both layers of the snowflakes with the Winter Lace cartridge at about 2 1/2 inches.  Assemble the snowflakes and add some Stickles Glitter Glue in Frosted Lace to the white part of the snowflakes and allow them to dry.  Add a punched circle to the center and fasten it together with a large silver brad.
  • Cut some patterned paper at 3 1/4 x 2 3/4 inches (I used the brown striped paper and used a scallop border punch along the edges) in the edges with some Colorbox Fluid Chalk ink in Dark Brown.  Cut another patterned paper out at 2 3/4 x 2 3/4 inches , ink the edges, and then center and layer over the first patterned paper.  Add some drawn stitches along the top and bottom edges of the top layer.
  • Tear a strip of a third patterned paper at about 1 inch and adhere to the center of the layered patterned paper.
  • Stamp a sentiment in the bottom left corner of the patterned papers.
  • Tie some hemp twine around the center of the patterned papers into a bow.  Adhere the patterned papers with the twine tied around it to the middle of the tag....making sure the edges are lined up straight.
  • Add the snowflake to the right side of the tag as shown in the picture.  Add some ribbon to the top of the tag.

I made a total of 16 (I cut two pages of tags) to give with the homemade goodies for my neighbors.  I also added a cute little winter saying that I found online to print out and add to the back of the tags.  I was inspired by THIS SKETCH at 2 Sketches 4 You to create my tag.  I hope that you can are inspired to dress up your gifts this Christmas season with some wonderful tags of your own.  Thanks for stopping by!!

Supplies:
      Cardstock: Bazzill (blue), Stampin' Up! (white)
      Patterned paper: My Mind's Eye
      Die Cuts: Cricut Expression with Winter Lace and Wrap It Up cartridges
      Hemp Twine: Joann's
      Glitter: Stickles Glitter Glue - Frosted Lace
      Ink: Color Box Fluid Chalk - Dark Brown
      Stamp: Unity
      Brad: Making Memories
      Scalloped edge punch: Stampin' Up!


Wednesday, December 8, 2010

Thank You Very Much!! We Have A Winner!!

Thank you all so very much for all the birthday wishes.  I loved reading through all your comments and seeing your best organizational tips.  I definitely need them because my scrapping room looks like a paper bomb went off.  I need to put some of your great organizational tips to good use.  They were all great and here are a few of my favorites:

Crystal AKA Caitlynsmommy said:
"Since I am right in the middle of purging/organizing/purging my room I have to say my favorite organization is the homemade clip it up that I have going on. I put two S hooks on opposite ends of a shelf my DH made, then got a METAL dowel rod, some book rings and there you go easy peasy and all my too big for drawers and new things can go on it!"

Melissa said:
"My favorite organization tip is to keep all your scrap pieces in an accordian folder separated by colors! "

Shari said:
"I like to buy spice racks and put all my little brads in different jars. Also canisters for the kitchen work great for buttons and flowers."


Tracie said:
"My favorite tip for organizing is Ikea. I use their bathroom shelves to hold all of my carts - it's wonderful!"

I wish I had more than one of these carts to giveaway because you were all so fabulous to share you organizational tips with me.  I went to Random.org and had it pull a number from all the entries and here is the result:
And so that makes the winner of the Birthday Cakes Cricut cartridge:

Congratulations Christina!!
I will send you an email....be on the lookout.  If you see this before you receive the email, please EMAIL ME your shipping information to claim your prize.
Thanks again everyone!!  Check back for another fab giveaway in the New Year.

Hugs,

Monday, December 6, 2010

Valentine's Day Card & Some Sad News *sniff* *sniff*

I know, I know....it is way to early to be making Valentine's Day cards.....Christmas isn't even over yet.  But there is a wonderful new challenge up at Caardvarks and our sponsor is Clear & Simple Stamps.  They provided us with some fun stamps as well as samples of their new Color Story embellishments.  The stamps that I received are the Love Notes and the Color Story is Paint the Town Pink.  The challenge on the Caardvarks blog is to make a monochromatic card like mine below.  Now the sad news is that this will be Caardvarks last challenge.  Yes, you read that right.  Caardvarks will not be doing any more challenges after this one. *sniff* *sniff* So you better get on over there to check out the other design team members cards and get your monochromatic card linked up by the challenge deadline.  There are some wonderful prizes up for grabs.

        Cardstock: Clear & Simple (pink) and Stampin' Up! (white)
        Ribbon, stamps, ink: Clear & Simple

I would like to take a moment to thank the members of the Caardvarks crew (past and present) for all the amazing talent and inspiration that they have shared with us over the last 4 years.  I would especially like to thank Jenyfur for giving me the chance to be on such a wonderful dream team of designers.  I wish you all the best in wherever your path leads.

I will be posting the winner of my birthday blog giveaway in the next day or two.  Thank you to everyone for the wonderful birthday wishes!!

Hugs,

Friday, December 3, 2010

Holiday Blog Hop With the ScrapbookPal Design Team

Hello everyone and welcome to my blog!!  Today the ScrapbookPal design team is having a Holiday Blog Hop that will last all weekend.  I hope you can join us.

If you haven't been shopping at ScrapbookPal.com, you should check it out sometime.  They have fabulous prices on all kinds of crafting tools and supplies....from Cricut products and adhesive to Copic markers and ink pads.  One of my favorite things about shopping at ScrapbookPal is the free US shipping on all orders over $25 and my orders always arrive quickly. 

Today, I am going to share with you some ornaments that I made for my Christmas tree with the Limited Edition Winter Lace cartridge
I used my Cricut Exression to cut out 12 of the various 3D snowflakes that are on this cartridge.  I cut them all at 3 inches out of the clear plastic packaging that comes on all of the new cartridges.  I cut out the flat surfaces and then save them up to use on my projects like this one.  I use my Deep Cut Blade and Housing for cutting this material, but you could probably use the regular blade and housing with the multicut set for 4 or more passes.  After I cut and assembled the snowflakes, I added some Frosted Lace Stickles to the edges and let it dry and then hung them on my tree.

(I cut three sets like the one above)

Now on to the rest of the blog hop.  To particiapte, you need to hop along the list and visit each of the design team members blogs and leave comments along the way.  Hop back to the ScrapbookPal blog to become a follower and then leave a comment for your chance to win a Cricut cartridge of your choice from in stock cartridges at ScrapbookPal.com.  If you want to become a follower on my blog, I would love it, but it is not a requirement to win the prize.  (I am having a giveaway HERE for a cricut cartridge if you want to check that out before you continue on the hop)

ScrapbookPal Blog
Jamie Cripps
Crystal Butler
Amy Crockett (you are here)
Tammy White  (your next stop)
Leah Cornelius
Tomi Ann Hill
Cheryl Walker
ScrapbookPal Blog

You have until 11:59 PM MST on Sunday December 5th to participate and get your name in the drawing to win a Cricut cartridge of your choice from ScrapbookPal.com.  Thanks for stopping by and I love reading your comments.  Have fun and Happy Hopping!!

Hugs,