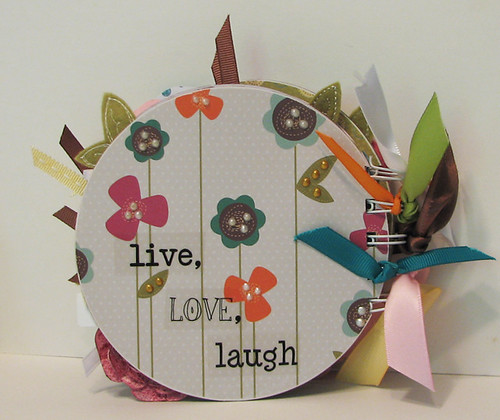
Here is a mini album that I made out of some of the
many old CDs that we have in a box next to the computer. My hubby says that he should sell them to be used in skeet shooting, but I convinced him that I can make some fab things with them like this super cute mini album. I used my
Cricut Expression to cut the circles that are covering the CDs and the
Paisley cartridge to cut the layered flowers. I also used the wonderful
Viva Decor Pearl Pens to accent the pages in my mini album. Click on the pics to view them larger.
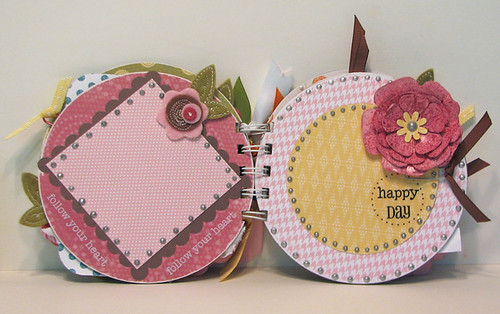
Pages 1 and 2
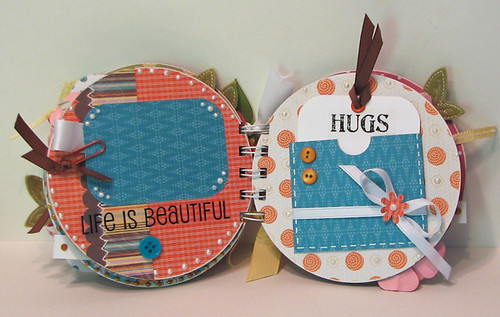
Pages 3 and 4
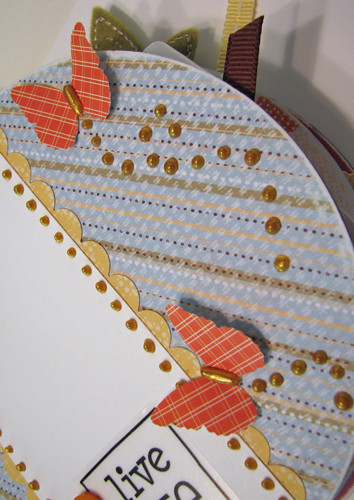
Pages 5 and 6
Pages 7 and 8
Pages 9 and 10
Back Cover
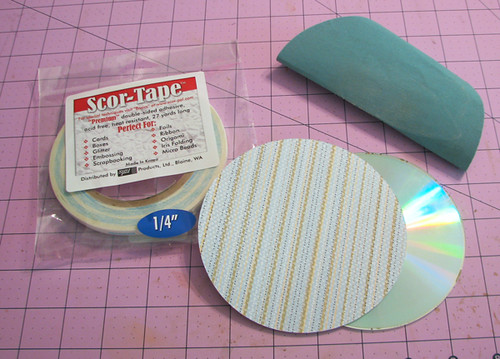
Here is a mini tutorial on how to cover the CDs:
Step 1: Gather your supplies.
You will need a CD, 5 inch circle cut out of patterned paper,
Scor-Tape, and sandpaper
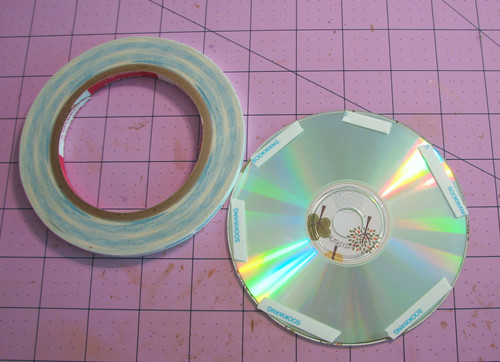
Step 2: Place strips of
Scor-Tape to the outside edge of the CD
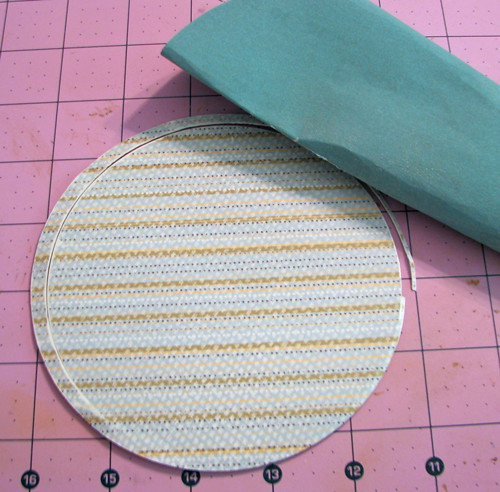
Step 3: Adhere the 5 inch circle over the CD and then sand off the edge that overlaps the CD. This gives it a perfect distressed finish and fits the CD perfectly.
Step 4: Decorate the finished CD page and then bind to other completed pages with your favorite binding machine.
I just love the
Scor-Tape. It works fabulously for those hard to adhere projects and it was the perfect adhesive for this project. I also love to use it to secure ribbon to projects (like the ribbon on page 2 of the mini album above). I have never had any other adhesive hold ribbon to paper as well as the
Scor-Tape does.
Another of my new favorite items is the
Viva Decor Pearl Pen. It works fabulously to add a perfect dimensional accent to any card, scrapbook page, or mini album. It even is a fabulous accent for clothing as shown by other members of the ScrapbookPal design team. Here I used the
Gold color to accent the butterfly body and also the butterfly trail (on page 6 of the mini album):
Here I used the
Silver color to add a center to the flower on the cover of the mini album:
To create this flower, I cut out 4 different sizes on my
Cricut Expression with the
Paisley cartridge. I then rolled the petals and then pinched the ends a little. I then covered with some Mod Podge and when they were dry, I spritzed a little
Glimmer Mist onto them. I layered and adhered them together with some
Glue Dots and then added a little punched flower to the middle along with the
Viva Decor Pearl Pen center.
Supplies:
Cardstock, patterned paper, ribbon, felt flowers: Stampin' Up!
Die Cuts: Cricut Expression with George and Basic Shapes and Paisley carts
Stickers: SRM Stickers
Punches: Stampin' Up! (scallops, corner rounder, flowers),
Martha Stewart (butterflies)
Pearl accents: Viva Decor Pearl Pens
Adhesive: Scor-Tape, Glue Dots, Scotch ATG
White gel pen: Sakura
Binding system: Bind It All
Other: CDs, buttons, paper clips, Glimmer Mist
I hope you enjoy my mini album and tutorial!! Have a fabulous day!!
Amy