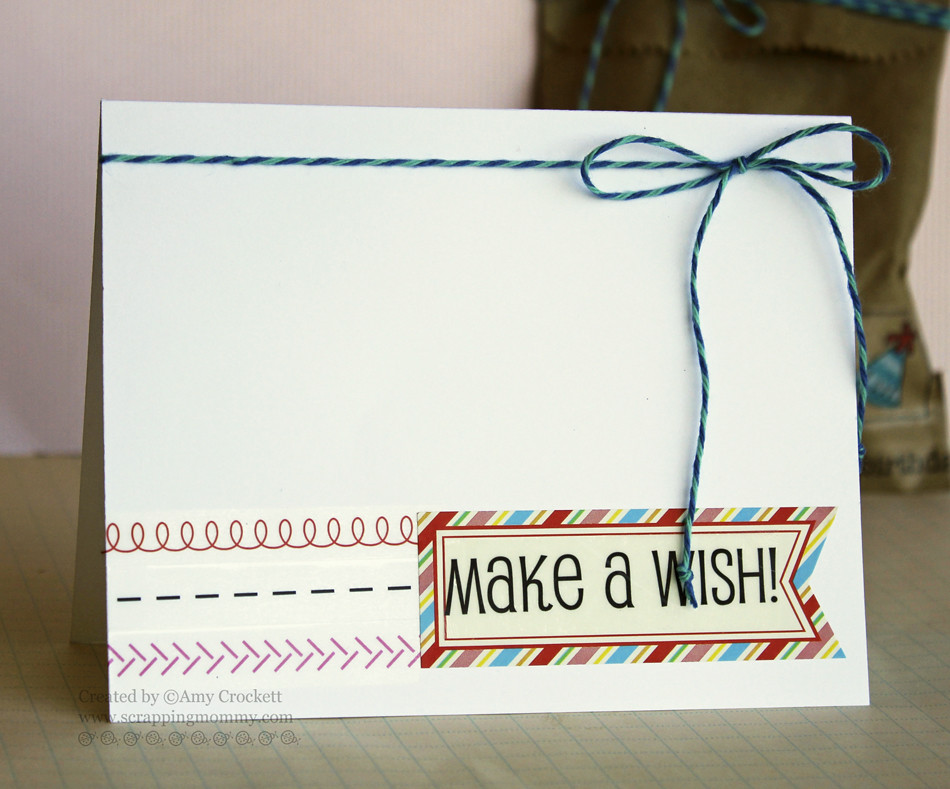
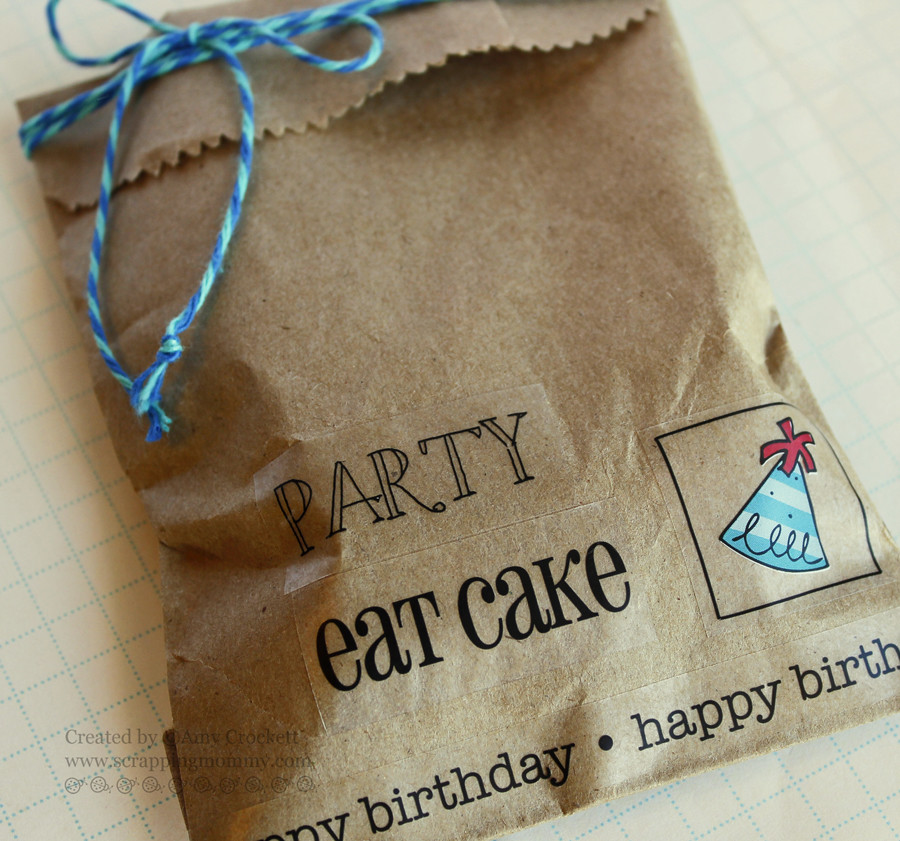
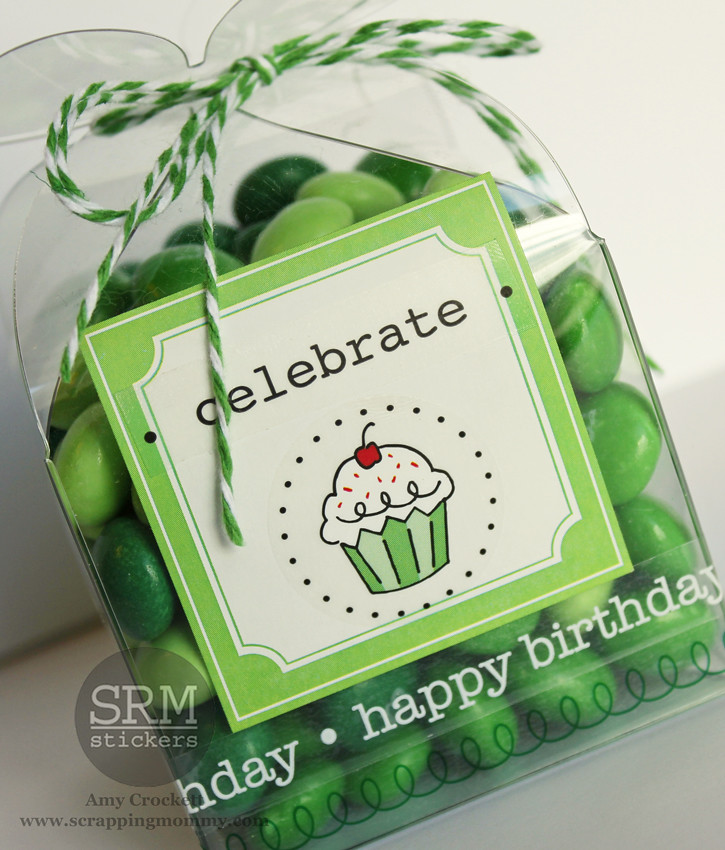
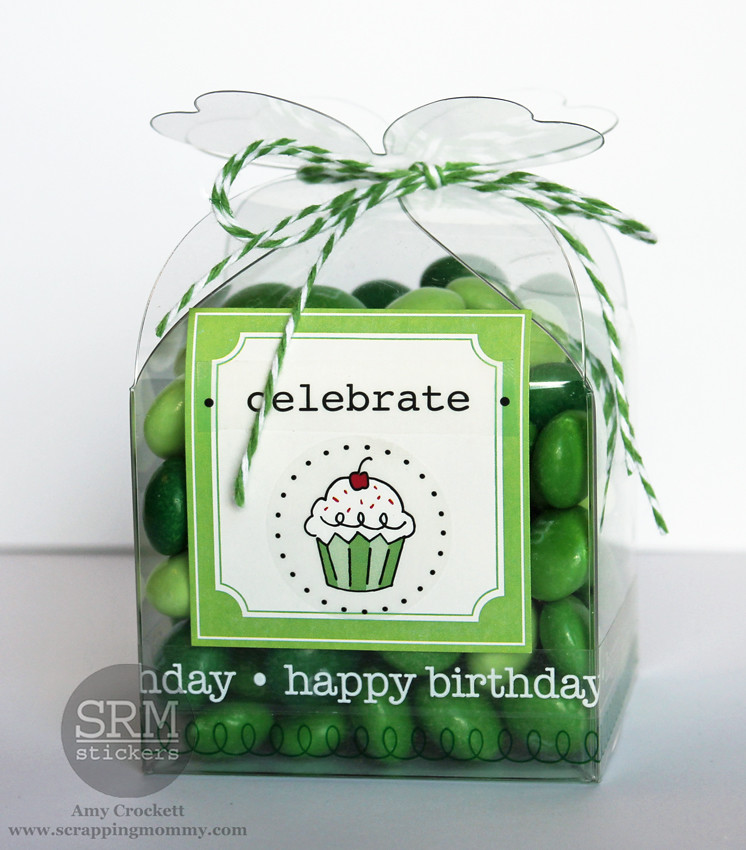
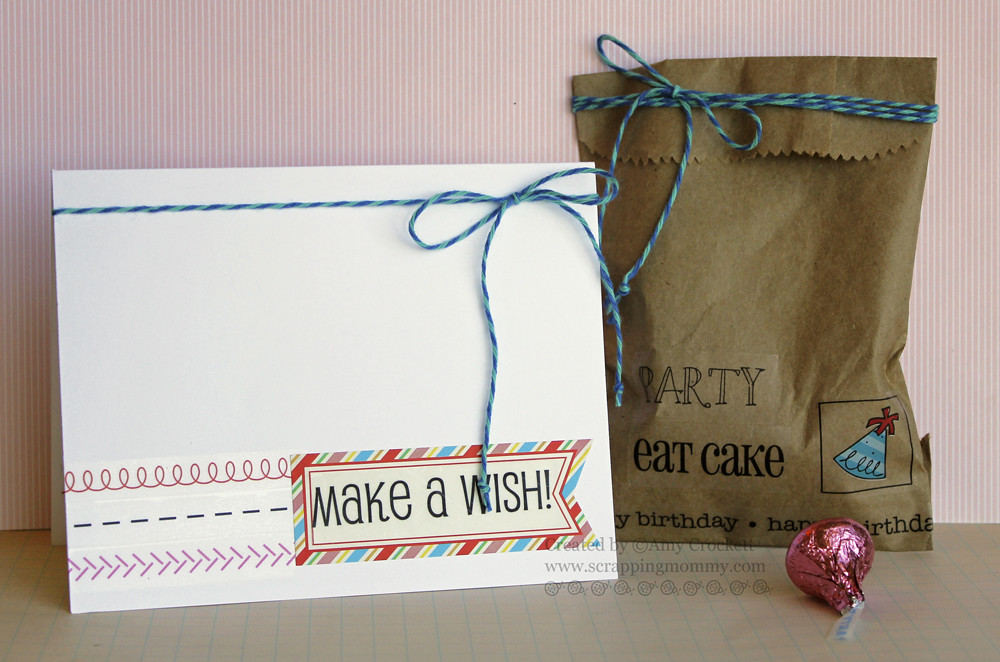
Hello!! This week I got to post on a fun feature on The Twinery blog using SRM Stickers. I was sent some beautiful and yummy SRM Stickers with a birthday theme and here is what I created with them.
I used the We’ve Got Your Sticker/Happy, Labels by the Dozen/Bright Blank, and Sticker Stitches from SRM Stickers along with the 4x6 Kraft bag. The twine is a soon to be release over at The Twinery. It will be in limited supply, so be sure to get your hands on it when it goes live. Here are some closer pics of my project.....
So, there is a quick and easy gift idea for someone in your life. Hop on over to The Twinery blog to see all the wonderful SRM Sticker/Twinery combinations this week.
Hugs,
Amy
Showing posts with label SRM Stickers. Show all posts
Thursday, September 29, 2016
Thursday, August 11, 2016
Thanks So Much Pillowbox with The Twinery and SRM Stickers
Hello!! Today I get to share a wonderful project over on The Twinery blog that features two of my favorite companies.....SRM Stickers and The Twinery!
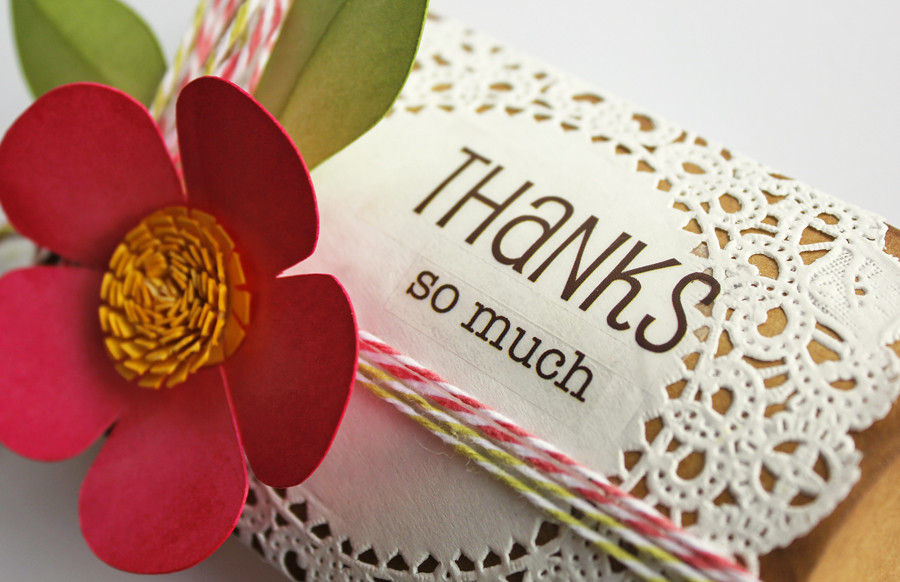
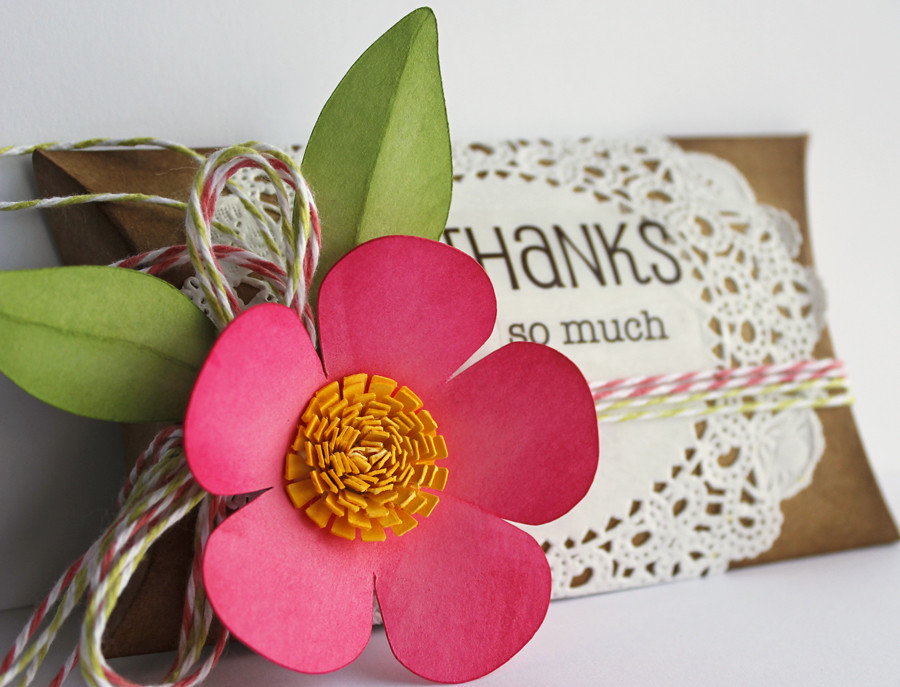
For the base of my project, I used the Medium Kraft Pillow Box from SRM Stickers. I added a little bit of ink around the edges of it and then added the pretty White Lace Doily over the top of it. The sentiment is from the We've Got Your Sticker/Thanks. The bakers twine that I used today is Strawberry and Honeydew. I wrapped it around the pillow box and then tied it in a bow on the left side.
I cut the flower image on my Cricut Imagine. I inked up the edges of the cuts a bit and then glued them onto the pillow box.
I think that this pillow box is a great way to give a treat to show some gratitude towards someone. What would you fill it with?
Here is a look at the colors of bakers twine from The Twinery I used today....
I would really appreciate it if you would hop on over to the Twinery Blog and leave some feedback love for me over there, too.
Have a great day!
Hugs,
Amy
For the base of my project, I used the Medium Kraft Pillow Box from SRM Stickers. I added a little bit of ink around the edges of it and then added the pretty White Lace Doily over the top of it. The sentiment is from the We've Got Your Sticker/Thanks. The bakers twine that I used today is Strawberry and Honeydew. I wrapped it around the pillow box and then tied it in a bow on the left side.
I cut the flower image on my Cricut Imagine. I inked up the edges of the cuts a bit and then glued them onto the pillow box.
I think that this pillow box is a great way to give a treat to show some gratitude towards someone. What would you fill it with?
Here is a look at the colors of bakers twine from The Twinery I used today....
Have a great day!
Hugs,
Amy
Post Related to:
cricut,
Gifts,
Misc,
SRM Stickers,
The Twinery
Thursday, August 4, 2016
The Sweet Taste of Summer!
Hello everyone!! It has been a while since my last post and I was hoping to get into more crafting this summer, but things have been crazy busy around here. I did get this post up over on The Twinery blog yesterday and I wanted to share it here with you, too.
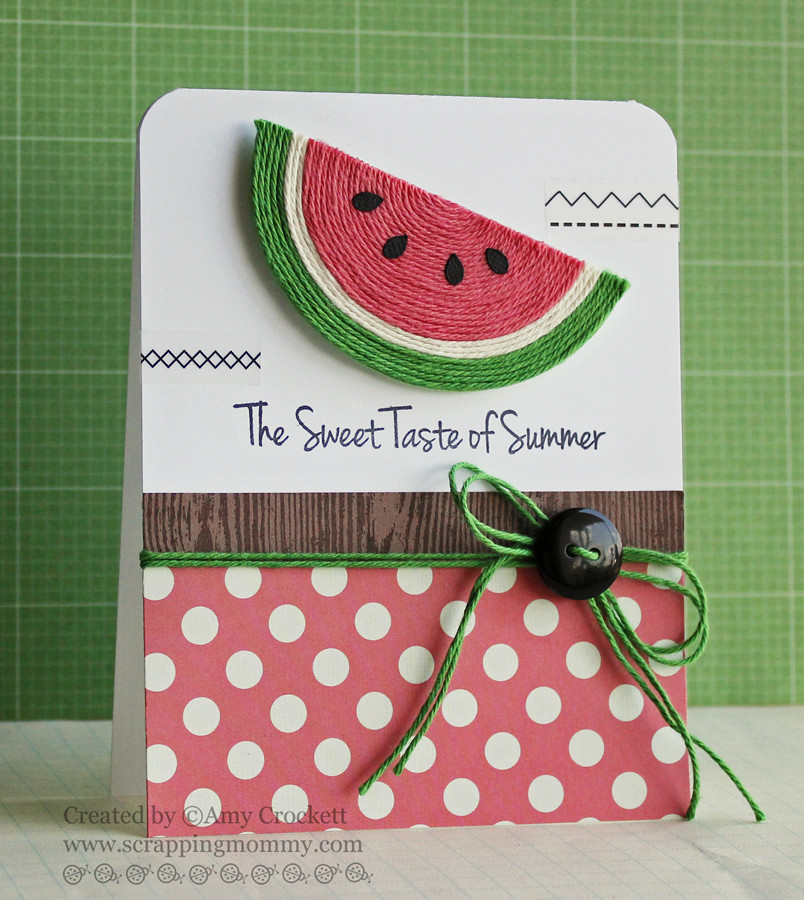
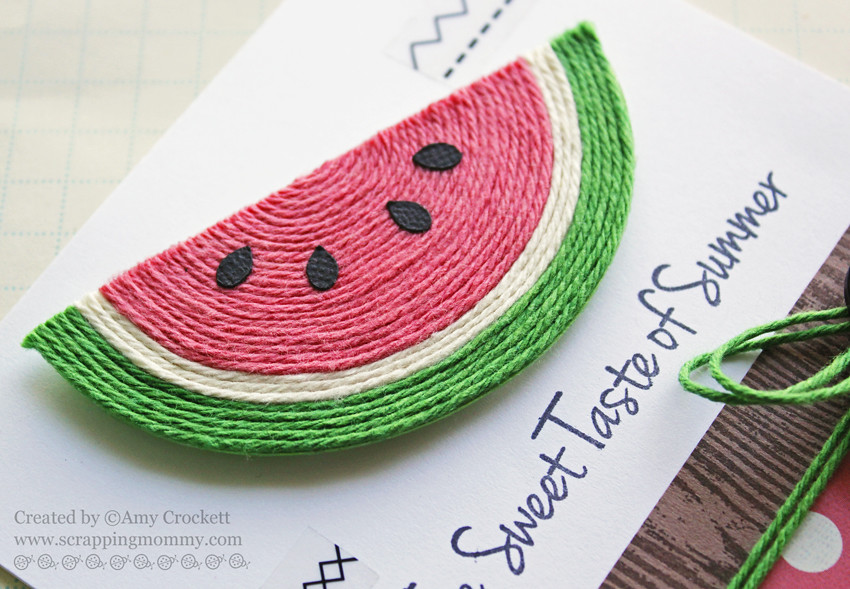
First I die cut an image with my Cricut Explore and then added some adhesive over it and filled it in with some yummy bakers twine from The Twinery. I used some yummy Solid Peapod, Solid Natural, and Solid Strawberry bakers twine on my card. I glued the die cut seeds over the twine for a real watermelon look. Here is a closer look at that wonderful watermelon.
I added some sticker stitches from SRM Stickers and the sentiment is stamped from an older (out of date and production) stamp set.
So, did you have some watermelon this week? I would love it if you left a comment here and over on The Twinery blog post....it would let me know that there was someone out there reading my posts.
Hugs,
Amy
First I die cut an image with my Cricut Explore and then added some adhesive over it and filled it in with some yummy bakers twine from The Twinery. I used some yummy Solid Peapod, Solid Natural, and Solid Strawberry bakers twine on my card. I glued the die cut seeds over the twine for a real watermelon look. Here is a closer look at that wonderful watermelon.
I added some sticker stitches from SRM Stickers and the sentiment is stamped from an older (out of date and production) stamp set.
So, did you have some watermelon this week? I would love it if you left a comment here and over on The Twinery blog post....it would let me know that there was someone out there reading my posts.
Hugs,
Amy
Post Related to:
cards,
cricut,
SRM Stickers,
stamping,
The Twinery
Sunday, May 8, 2016
Happy Mother's Day!!
Hello friends and Happy Mother's Day!! I created this card the other day and posted it over on The Twinery blog, and I thought that today would be an excellent day to post it here.
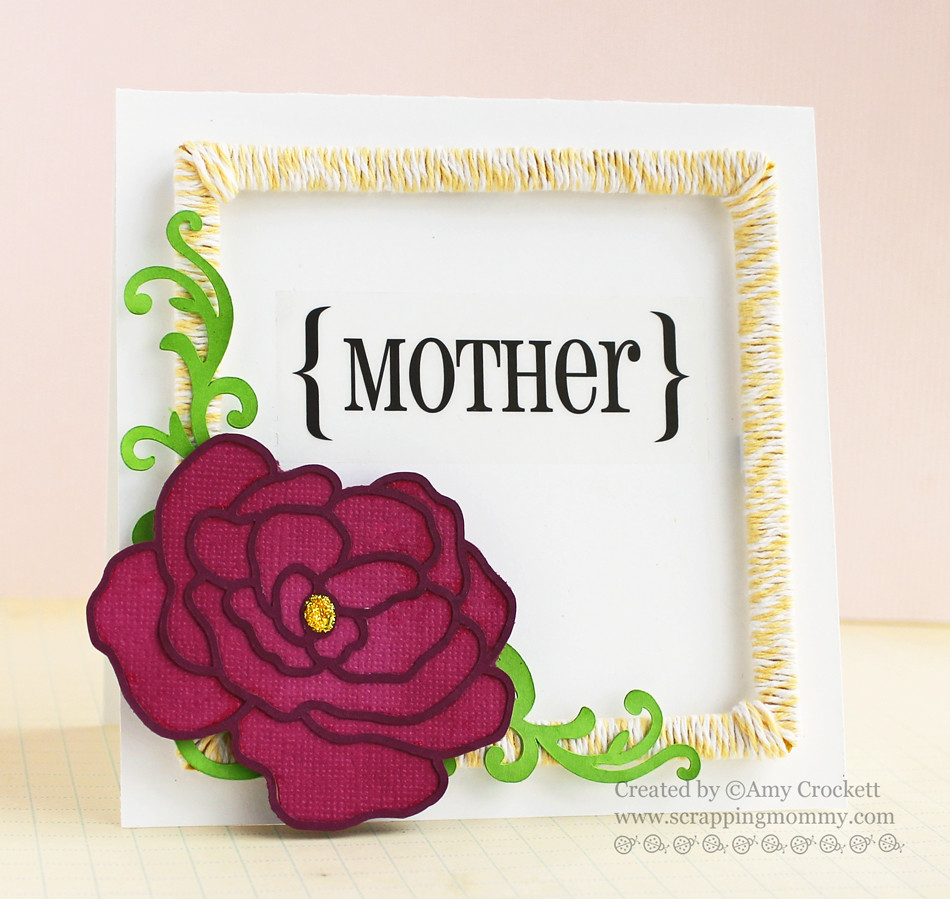
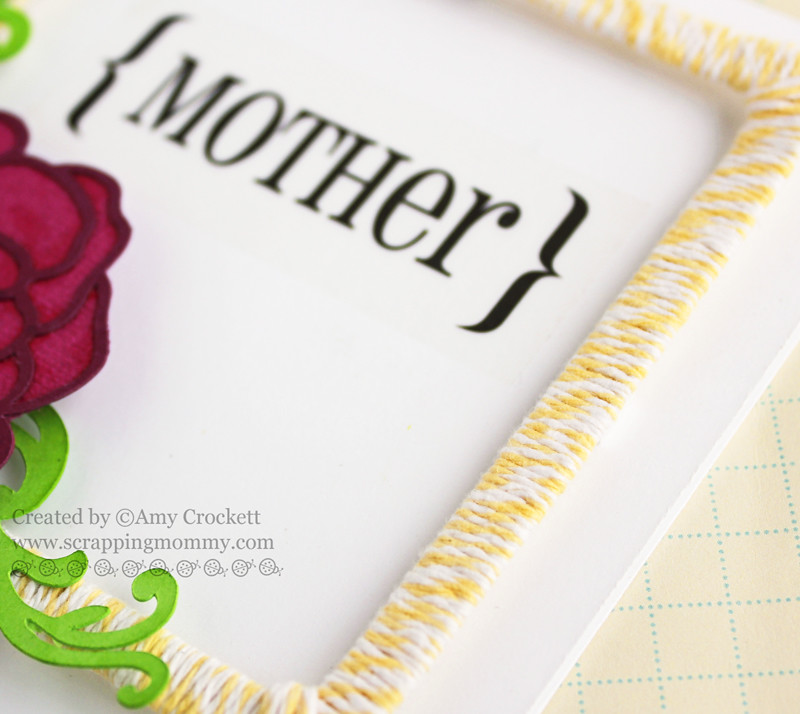
I wrapped a square frame with some Buttercream bakers twine from The Twinery and then cut out the floral and flourish with my Cricut Explore. The sentiment is from SRM Stickers. This card measures about 4 1/2 inches square. Here is a closer look at the wrapped twine.
It took me a little bit to wrap all the twine, but I just caught up on a show while I was wrapping it up. To finish it off, I just added a bit of Stickles glitter glue to the center of the flower.
I hope that you are enjoying Mother's Day with the ones you love!! Have a great day!!
Hugs,
Amy
I wrapped a square frame with some Buttercream bakers twine from The Twinery and then cut out the floral and flourish with my Cricut Explore. The sentiment is from SRM Stickers. This card measures about 4 1/2 inches square. Here is a closer look at the wrapped twine.
It took me a little bit to wrap all the twine, but I just caught up on a show while I was wrapping it up. To finish it off, I just added a bit of Stickles glitter glue to the center of the flower.
I hope that you are enjoying Mother's Day with the ones you love!! Have a great day!!
Hugs,
Amy
Post Related to:
cards,
cricut,
SRM Stickers,
The Twinery
Tuesday, May 3, 2016
Happy Teacher Appreciation Day/Week!!
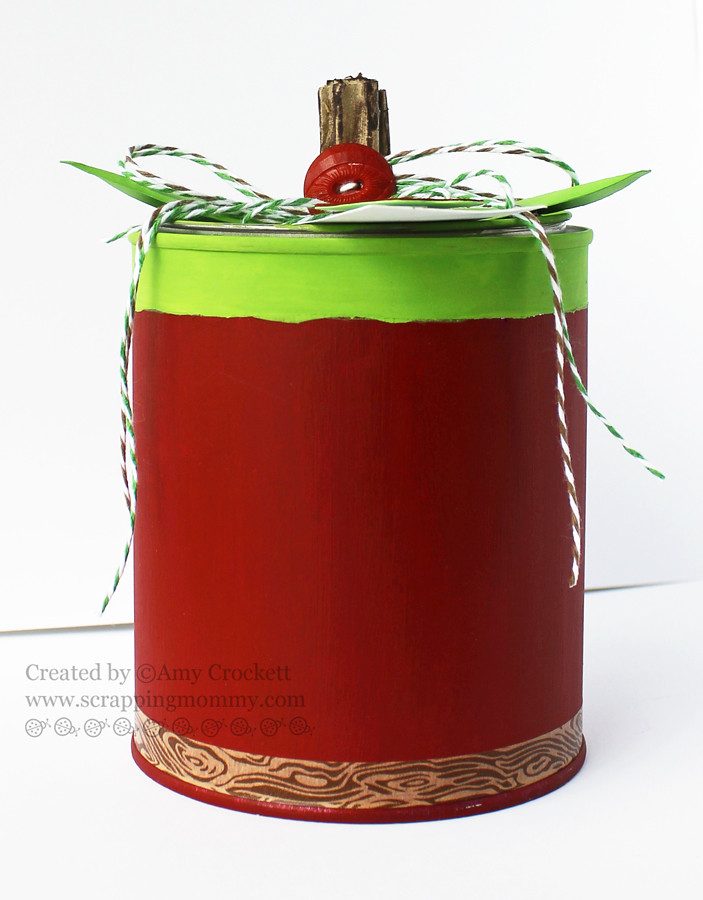
Hello everyone!! I have a super cute treat container to share with you today that is made out of a pint paint sized can. This posted last week over on The Twinery blog.
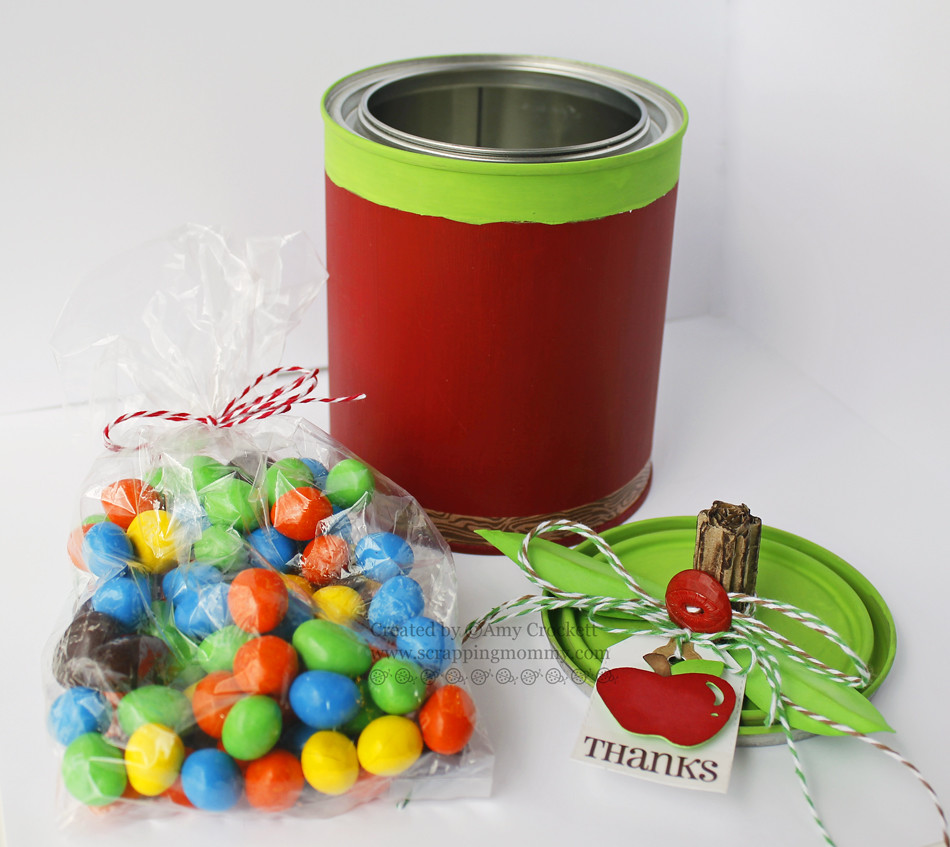
I started out with a blank can and painted it red and green like an apple. I rolled up a bit of corrugated cardboard and inked it with a brown color for the apple stem and hand cut out some leaves. I hot glued them all on and then tied it all up with some Cappuccino and Peapod bakers twines and added a red button in the middle. The tag is made with THIS die from My Creative Time and the apple is cut with my Cricut Explore. I added a Thanks sentiment from SRM Stickers. Here is a closer look.....
I added some woodgrain washi tape to the bottom of the can for a bit of fun texture.......
I filled it with a bag of chocolate candies, but you could fill it with just about anything you wanted to for that special teacher in your life. I actually homeschool, so my kids have been filling up this can with treats, sweet notes and pictures for me. I can't wait to see what they have put inside.
What do you think? Happy Teacher Appreciation Day/Week to all the teachers out there!!
Hugs,
Amy
I started out with a blank can and painted it red and green like an apple. I rolled up a bit of corrugated cardboard and inked it with a brown color for the apple stem and hand cut out some leaves. I hot glued them all on and then tied it all up with some Cappuccino and Peapod bakers twines and added a red button in the middle. The tag is made with THIS die from My Creative Time and the apple is cut with my Cricut Explore. I added a Thanks sentiment from SRM Stickers. Here is a closer look.....
I added some woodgrain washi tape to the bottom of the can for a bit of fun texture.......
I filled it with a bag of chocolate candies, but you could fill it with just about anything you wanted to for that special teacher in your life. I actually homeschool, so my kids have been filling up this can with treats, sweet notes and pictures for me. I can't wait to see what they have put inside.
What do you think? Happy Teacher Appreciation Day/Week to all the teachers out there!!
Hugs,
Amy
Post Related to:
cricut,
Food Items,
Gifts,
My Creative Time,
SRM Stickers,
The Twinery
Monday, April 11, 2016
Bloom and Grow...It's Spring Time!
Oops!! I almost forgot to get this super cute treat bag posted on my blog. I shared it over on The Twinery blog last week and wanted to make sure that all of my readers got a peek at it, too.
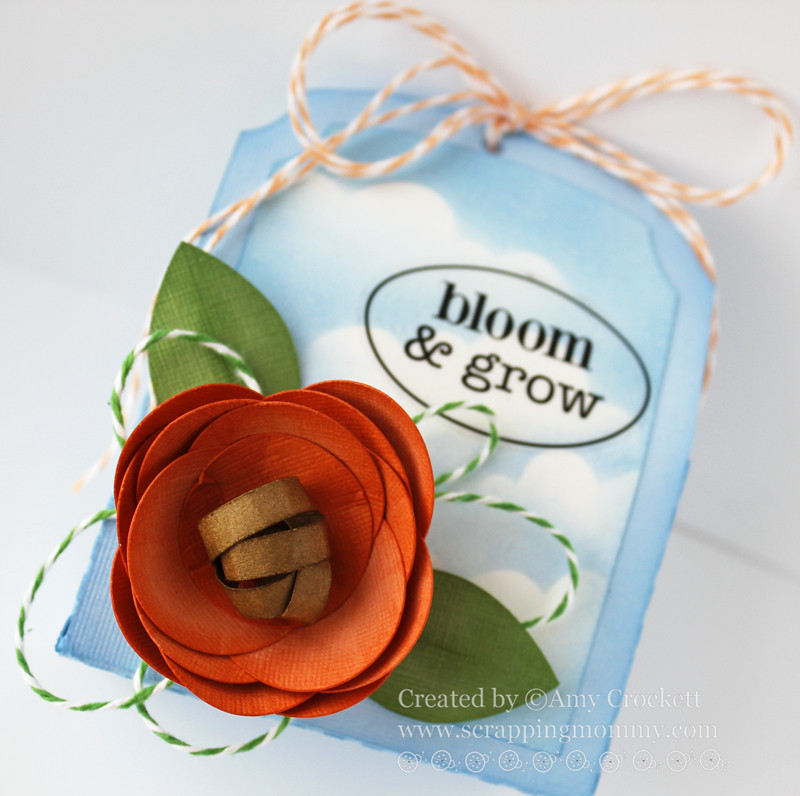
I used some blue ink and a cloud die cut to make the sky background on white cardstock. This bag is cut from THIS image and the flower is THIS image from the Silhouette store. I used the Cantaloupe bakers twine to tie up the box and Peapod bakers twine behind the flower. Here is another look at the flower.....
To finish off my treat bag, I used a wonderful SRM Sticker. What do you think?? Would you like to receive this as a gift from someone?? I can't wait to brighten someone's day with it.
Thanks for stopping by!!
Hugs,
Amy
I used some blue ink and a cloud die cut to make the sky background on white cardstock. This bag is cut from THIS image and the flower is THIS image from the Silhouette store. I used the Cantaloupe bakers twine to tie up the box and Peapod bakers twine behind the flower. Here is another look at the flower.....
To finish off my treat bag, I used a wonderful SRM Sticker. What do you think?? Would you like to receive this as a gift from someone?? I can't wait to brighten someone's day with it.
Thanks for stopping by!!
Hugs,
Amy
Post Related to:
Gifts,
Silhouette,
SRM Stickers,
The Twinery
Tuesday, March 8, 2016
Rainbow Fringe Birthday Card
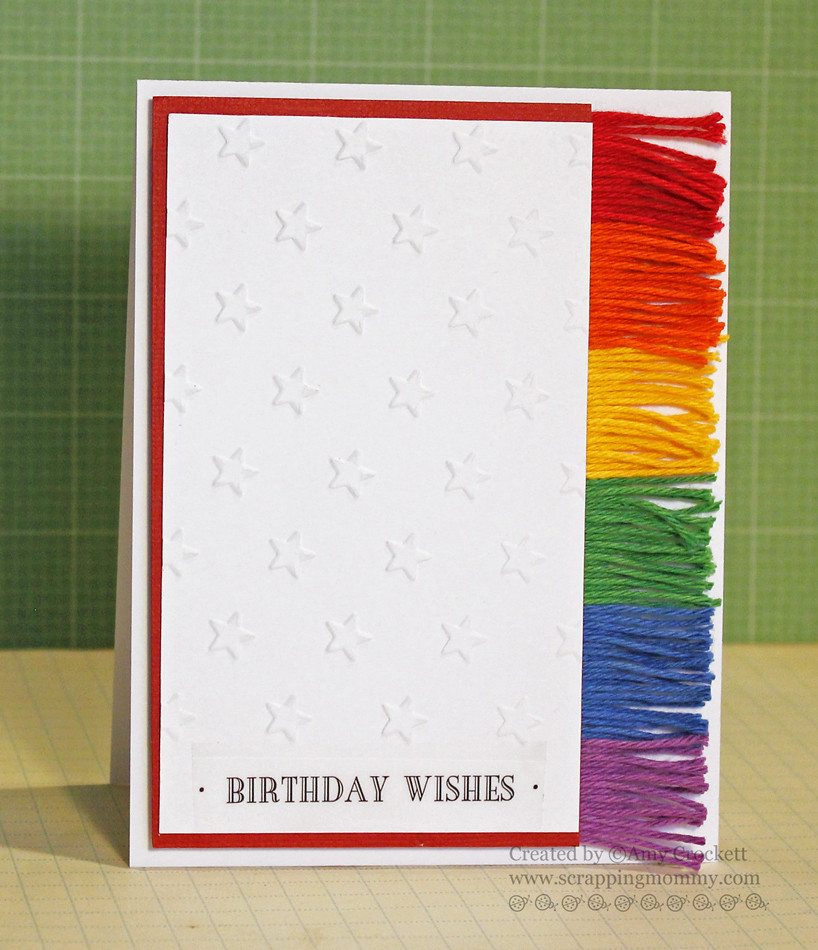
Hello and welcome!! I am excited to share this super colorful birthday card with you that has a rainbow fringe with some yummy solid bakers twine from The Twinery.
I created this card for my daughter who's birthday is on St. Patrick's Day. She loves to celebrate her birthday on that day and welcomes anything that has to do with the holiday for her birthday.....I knew that a rainbow card would be prefect for her.
If you want to see how I created the fringe, hop on over to The Twinery blog to see how I made it. Here is a closer look at the fringe......
I used a star embossing folder in my Cuttlebug for the embossing and finished it off with a Fancy Sentiment from SRM Stickers. So, do you like rainbow patterns?? Do you use them on your craft projects??
Have a great day!!
Hugs,
Amy
I created this card for my daughter who's birthday is on St. Patrick's Day. She loves to celebrate her birthday on that day and welcomes anything that has to do with the holiday for her birthday.....I knew that a rainbow card would be prefect for her.
If you want to see how I created the fringe, hop on over to The Twinery blog to see how I made it. Here is a closer look at the fringe......
I used a star embossing folder in my Cuttlebug for the embossing and finished it off with a Fancy Sentiment from SRM Stickers. So, do you like rainbow patterns?? Do you use them on your craft projects??
Have a great day!!
Hugs,
Amy
Post Related to:
cards,
cuttlebug,
SRM Stickers,
The Twinery
Friday, March 4, 2016
St. Patrick's Day Treat Containers with SRM Stickers
Hello friends!! Today I get to share this fun St. Patrick's Day treat container over on the SRM Stickers blog.
Yes, I know, I know...this project has a bit of a birthday theme to it. That is because my oldest was born on St. Patrick's Day and she loves to have it incorporated into her birthday.
I used the super cute Clover Treat Box from SRM Stickers and decorated it up with some stickers from the Bright Blank Labels by the Dozen, We've Got Your Sticker - Happy, and Christmas Sticker Stitches.
I finished it off with some yummy Peapod Bakers Twine from The Twinery and filled it with some Chocolate Mint M&M's. Perfect for the holiday!!
Do you know of anyone who has a birthday on a holiday?? Do they like to celebrate the holiday with their birthday??
I would really appreciate if you would hop on over to the SRM Stickers blog and leave a little love on the post over there for me. Also leave a comment here to let me know you have visited. It is starting to feel a little bit lonely and like I am talking to myself here. LOL
I hope that you have a great weekend....and my you have the LUCK of the IRISH!!
Hugs,
Amy
Yes, I know, I know...this project has a bit of a birthday theme to it. That is because my oldest was born on St. Patrick's Day and she loves to have it incorporated into her birthday.
I used the super cute Clover Treat Box from SRM Stickers and decorated it up with some stickers from the Bright Blank Labels by the Dozen, We've Got Your Sticker - Happy, and Christmas Sticker Stitches.
I finished it off with some yummy Peapod Bakers Twine from The Twinery and filled it with some Chocolate Mint M&M's. Perfect for the holiday!!
Do you know of anyone who has a birthday on a holiday?? Do they like to celebrate the holiday with their birthday??
I would really appreciate if you would hop on over to the SRM Stickers blog and leave a little love on the post over there for me. Also leave a comment here to let me know you have visited. It is starting to feel a little bit lonely and like I am talking to myself here. LOL
I hope that you have a great weekend....and my you have the LUCK of the IRISH!!
♣♣♣♣♣♣♣♣♣♣♣♣♣♣♣♣♣♣♣♣♣
Hugs,
Amy
Post Related to:
Food Items,
Gifts,
Misc,
SRM Stickers,
The Twinery
Friday, February 12, 2016
Mini Valentine Cards - Quick and Easy!
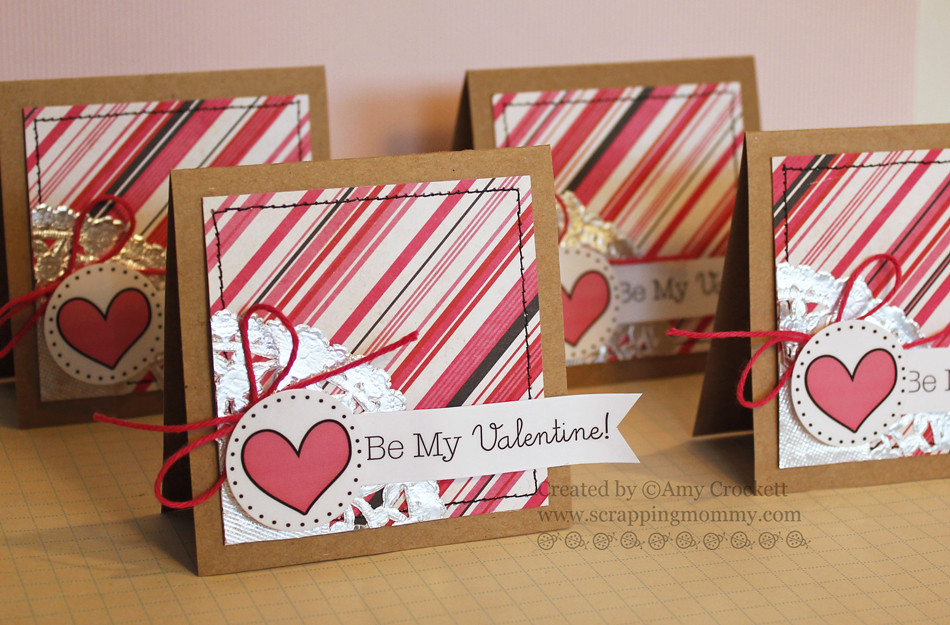
Hello everyone!! WooHoo!! I am getting some new posts up!! I am excited to share these mini Valentine's Day cards came together so quick and easy. I have also shared these over on the SRM Stickers blog.
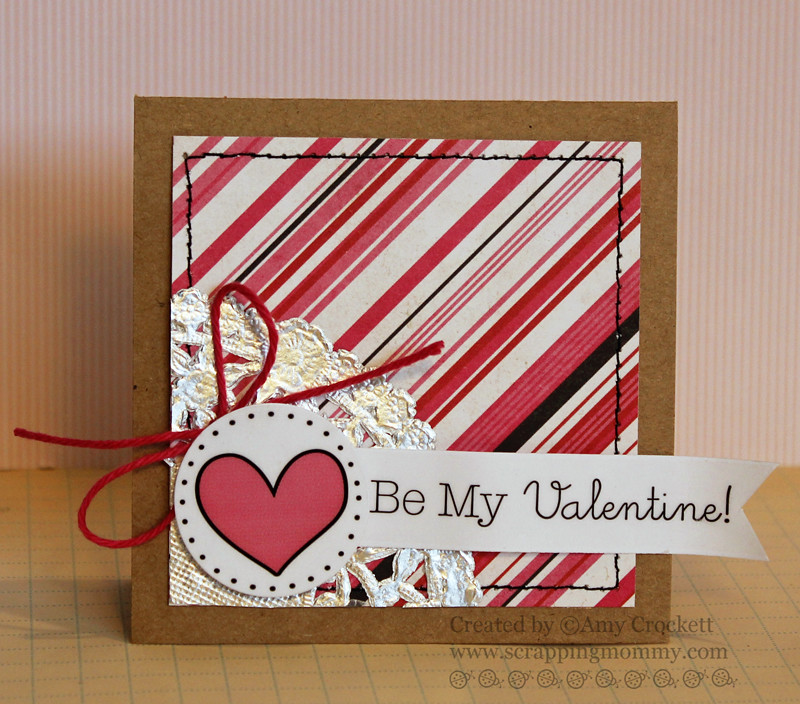
I started with some 3 1/2 x 7 inch card bases and then folded them in half. I then stitched around a 3x3 inch striped paper from Echo Park and mounted that to the card base. I used a silver lace doily, cut into 1/4, and added them to the bottom left corner of the patterned paper. I used the Stickers by the Dozen - Valentine for the heart and the sentiment. I mounted them with foam adhesive to the bottom of the card. Take a closer look.....
I finished off the card with a bit of Solid Pink Sorbet bakers twine from The Twinery. I made all four of these mini cards in under an hour. So quick and fun to slip into a lunch tin or school bag. Here is the finished card.....
I would really appreciate it if you would leave a comment for me below letting me know how you will be spending your Valentine's Day. If you would, please hop over to the SRM Stickers blog and let them know how much you love these mini cards. I will be spending the day with the ones I love.
I am thinking that we are long over due on this blog for a giveaway. If we can get enough interest, I will be posting a giveaway on my blog. Let me know that you would like to have a giveaway by leaving a comment under THIS POST on facebook and sharing it with your friends and family. Thanks so much!!
Hugs,
Amy

I started with some 3 1/2 x 7 inch card bases and then folded them in half. I then stitched around a 3x3 inch striped paper from Echo Park and mounted that to the card base. I used a silver lace doily, cut into 1/4, and added them to the bottom left corner of the patterned paper. I used the Stickers by the Dozen - Valentine for the heart and the sentiment. I mounted them with foam adhesive to the bottom of the card. Take a closer look.....
I finished off the card with a bit of Solid Pink Sorbet bakers twine from The Twinery. I made all four of these mini cards in under an hour. So quick and fun to slip into a lunch tin or school bag. Here is the finished card.....
I would really appreciate it if you would leave a comment for me below letting me know how you will be spending your Valentine's Day. If you would, please hop over to the SRM Stickers blog and let them know how much you love these mini cards. I will be spending the day with the ones I love.
I am thinking that we are long over due on this blog for a giveaway. If we can get enough interest, I will be posting a giveaway on my blog. Let me know that you would like to have a giveaway by leaving a comment under THIS POST on facebook and sharing it with your friends and family. Thanks so much!!
Hugs,
Amy
Post Related to:
cards,
SRM Stickers,
The Twinery
Wednesday, February 10, 2016
Will You Be My Valentine Take-Out Box
Hello!! I get to share a fun treat box over on The Twinery blog that would be great for you give to your special someone this Valentine's Day.
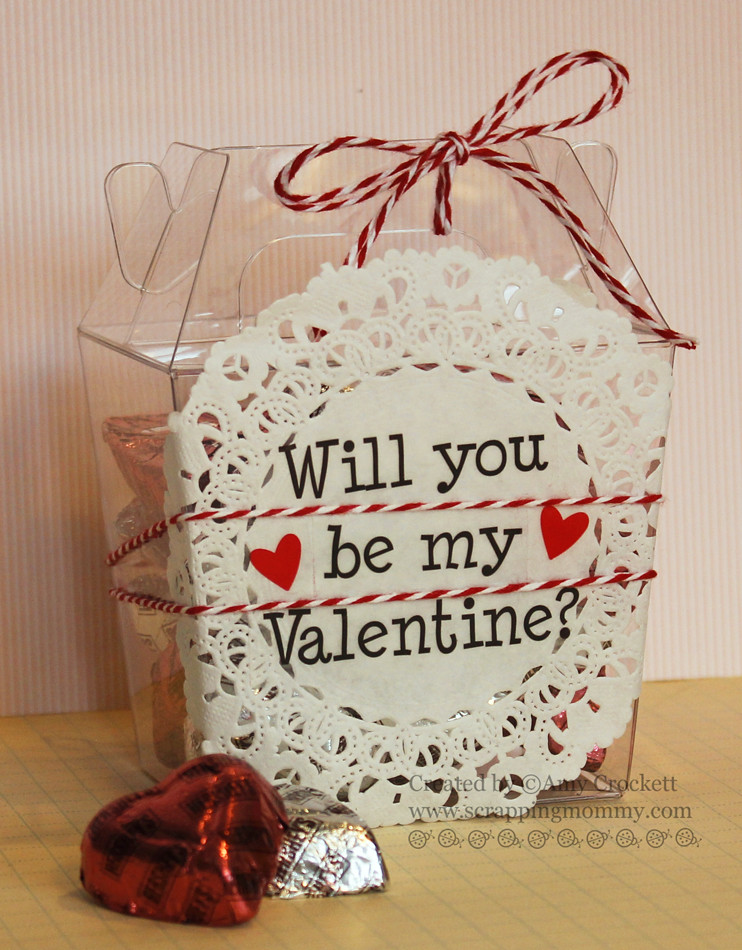
I used THIS cute transparent take-out box and filled it with some chocolate hearts (cuz chocolate is hubby's favorite). I then decorated the front with a lacy doily and added a sentiment from SRM Stickers. I used just a bit of adhesive on the back of the doily to hold it on the box where I wanted it and then tied it to the box with some Maraschino bakers twine. I added a double bow of Maraschino bakers twine to the top of the box....just to finish it off a bit. Take a closer look.....
Here is that lovely Maraschino bakers twine that I used on my project today......
You can check out this fun project over on The Twinery blog....I hope that you will leave a comment for me over there as well as here so that I know that you have seen/like my posts.
Thanks so much for stopping by!!
Have a great day!!
Amy
I used THIS cute transparent take-out box and filled it with some chocolate hearts (cuz chocolate is hubby's favorite). I then decorated the front with a lacy doily and added a sentiment from SRM Stickers. I used just a bit of adhesive on the back of the doily to hold it on the box where I wanted it and then tied it to the box with some Maraschino bakers twine. I added a double bow of Maraschino bakers twine to the top of the box....just to finish it off a bit. Take a closer look.....
Here is that lovely Maraschino bakers twine that I used on my project today......
You can check out this fun project over on The Twinery blog....I hope that you will leave a comment for me over there as well as here so that I know that you have seen/like my posts.
Thanks so much for stopping by!!
Have a great day!!
Amy
Post Related to:
Gifts,
Misc,
SRM Stickers,
The Twinery
Sunday, February 7, 2016
Home Sweet Home
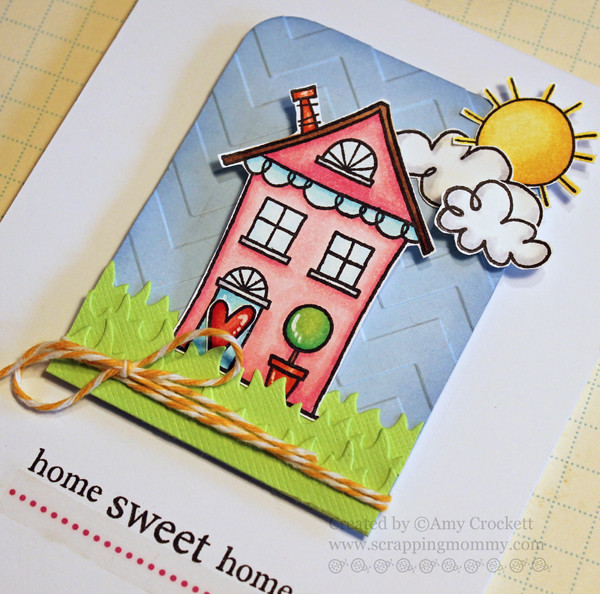
Hello friends!! I know it has been a while since you have seen a post from me.....I am so very sorry for that. I do have a card to share with you today that uses the super cute Home Sweet Home stamp set from Jane's Doodles.
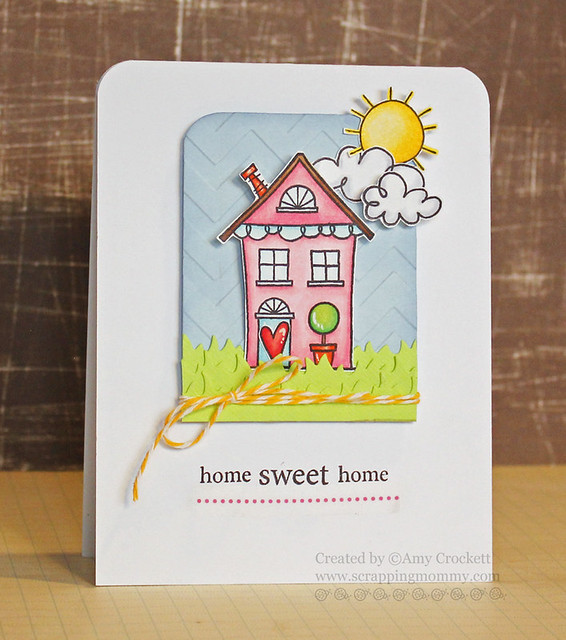
I colored in the images with my Copic markers and then cut them out. I mounted them onto this fun textured background that I created with a chevron embossing folder and then added a little bit of ink to the edges. I added some die cut grass pieces and then tied it up with some yummy Marigold bakers twine from The Twinery. I mounted it all onto a white cardstock base and added the sentiment and a little line of pink sticker dots from the Valentine Sticker Stitches. Take a closer look.....
I think that this will be a perfect card to give to someone who just moved into a new home, don't you?? This card was posted over on the SRM Stickers blog last week. I would love it if you would hop on over HERE and give me a little comment love there and here. Thanks so much!!
I do want to thank you for visiting my blog and for sticking with me over the last several months as I have battled with some health issues.....which probably led to me losing a bit of my crafting mojo as well. I can say that I have got back into my crafting room to start creating again and it feel so good. I do have a couple of new projects going up on the blog this next week.....so don't miss them!!
Hugs,
Amy
I colored in the images with my Copic markers and then cut them out. I mounted them onto this fun textured background that I created with a chevron embossing folder and then added a little bit of ink to the edges. I added some die cut grass pieces and then tied it up with some yummy Marigold bakers twine from The Twinery. I mounted it all onto a white cardstock base and added the sentiment and a little line of pink sticker dots from the Valentine Sticker Stitches. Take a closer look.....
I think that this will be a perfect card to give to someone who just moved into a new home, don't you?? This card was posted over on the SRM Stickers blog last week. I would love it if you would hop on over HERE and give me a little comment love there and here. Thanks so much!!
I do want to thank you for visiting my blog and for sticking with me over the last several months as I have battled with some health issues.....which probably led to me losing a bit of my crafting mojo as well. I can say that I have got back into my crafting room to start creating again and it feel so good. I do have a couple of new projects going up on the blog this next week.....so don't miss them!!
Hugs,
Amy
Post Related to:
cards,
Copics,
cuttlebug,
SRM Stickers,
stamping
Wednesday, December 9, 2015
ATC Calendar Tray with SRM Stickers
Hello friends!! Do any of you ever buy something and then look at it and wonder what you are going to do with it? Of course you don't.....well, I do and that is what happened when I bought this ATC Tray and didn't quite know how I wanted to use it. I knew that I wanted something amazing to go into it, but I just didn't know what.
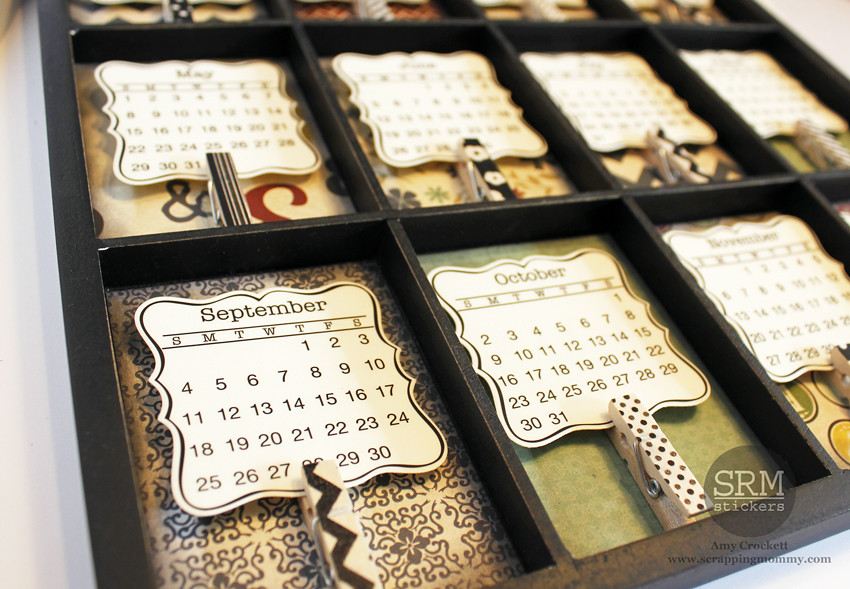
I had an assignment to make a calendar project for SRM Stickers and found that the 2016 Decorative Mini Calendar Stickers and cut with the new matching Wafer Thin Die fit in there perfectly. Take a look.....
To be able to re-use this calendar again next year (with the 2017 stickers, of course), I used some mini clothes pins and covered them with different black and white washi tapes. I then just used some hot glue to glue these onto the background paper.
I used the Times and Seasons papers from Echo Park for the background papers inside the tray.
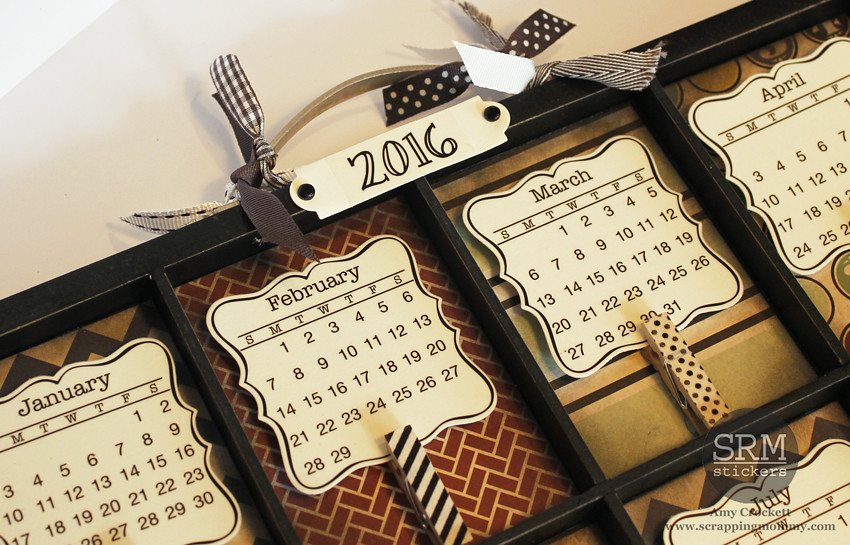
At the top of the ATC Tray, I used a sticker from the 2016 Year of Memories Stickers on some vanilla colored cardstock, added some brads to the ends and glued it with a glue dot to the top of the frame. To use it again next year, I will just have to peel this off and put on a new one...shouldn't be too hard.
To finish off my project, I added some black and white ribbons to the top handle.
So, what do you think of my new re-purposed ATC Tray? I think that it would be a great gift idea.
This was posted over on the SRM Stickers blog today and I would love it if you would leave a comment on the blog post over there, too.
Hugs,
Amy
I had an assignment to make a calendar project for SRM Stickers and found that the 2016 Decorative Mini Calendar Stickers and cut with the new matching Wafer Thin Die fit in there perfectly. Take a look.....
To be able to re-use this calendar again next year (with the 2017 stickers, of course), I used some mini clothes pins and covered them with different black and white washi tapes. I then just used some hot glue to glue these onto the background paper.
I used the Times and Seasons papers from Echo Park for the background papers inside the tray.
At the top of the ATC Tray, I used a sticker from the 2016 Year of Memories Stickers on some vanilla colored cardstock, added some brads to the ends and glued it with a glue dot to the top of the frame. To use it again next year, I will just have to peel this off and put on a new one...shouldn't be too hard.
To finish off my project, I added some black and white ribbons to the top handle.
So, what do you think of my new re-purposed ATC Tray? I think that it would be a great gift idea.
This was posted over on the SRM Stickers blog today and I would love it if you would leave a comment on the blog post over there, too.
Hugs,
Amy
Post Related to:
Altered Items,
Home Decor,
Misc,
SRM Stickers
Friday, November 13, 2015
Celebrate Fall!
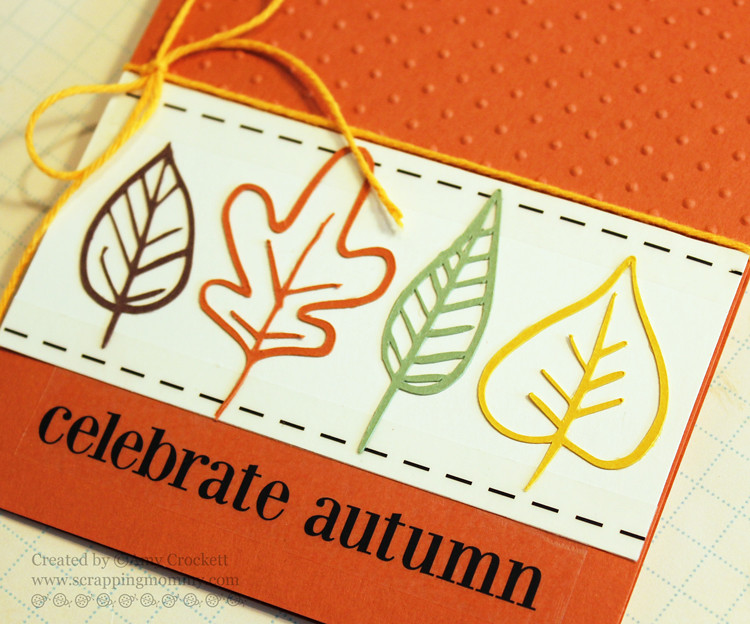
Happy Friday!! I don't know how about you, but I think that autumn goes by way too fast. It seems to have come in late this year and then left early with our first snow storm earlier this week. Autumn is my favorite season....the cool crisp air, the changing leaves, sweater weather, hot cocoa...I just love it all. I thought it would be fun to share a card that celebrates autumn just a little bit longer that mother nature wants to.
I created this card for the SRM Stickers blog last week.
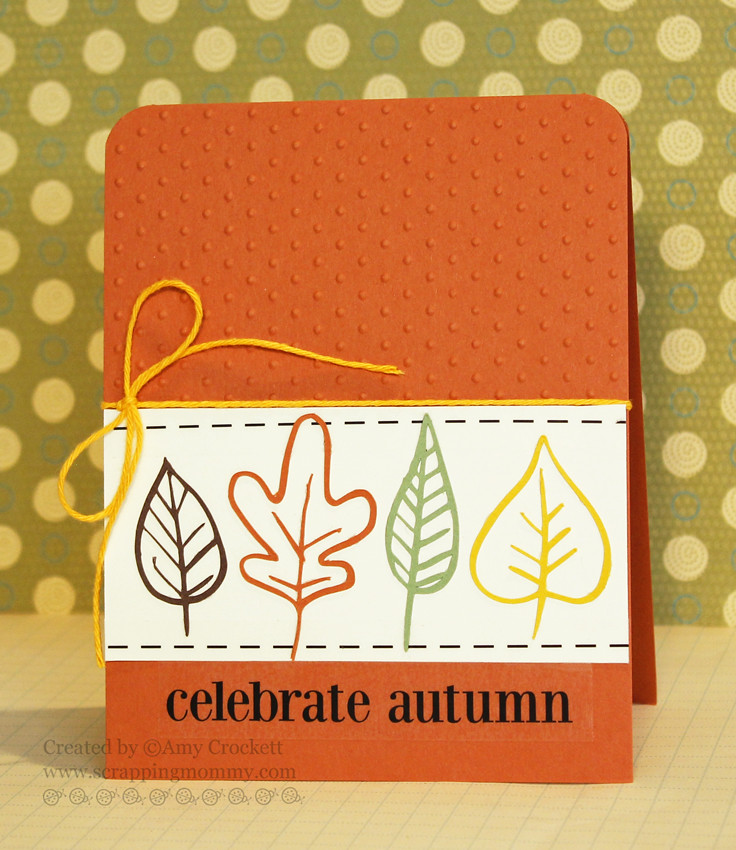
I used my Silhouette Cameo and THIS file to cut out the pretty little leaves. I used the Swiss Dots embossing folder and then added some Sticker Stitches and the sentiment is from the Fall Sticker Sentiments at SRM.
I tied it up with a bit of Solid Marigold bakers twine from The Twinery. Here is a closer look.....
So, what is your favorite season?? Is there something that you do to help it stretch out a bit longer??
If you missed the great tutorial that I posted last week for the Handmade Holidays blog hop, CLICK HERE to check it out. I hope that you have a great weekend!!
Hugs,
Amy
I created this card for the SRM Stickers blog last week.
I used my Silhouette Cameo and THIS file to cut out the pretty little leaves. I used the Swiss Dots embossing folder and then added some Sticker Stitches and the sentiment is from the Fall Sticker Sentiments at SRM.
I tied it up with a bit of Solid Marigold bakers twine from The Twinery. Here is a closer look.....
So, what is your favorite season?? Is there something that you do to help it stretch out a bit longer??
If you missed the great tutorial that I posted last week for the Handmade Holidays blog hop, CLICK HERE to check it out. I hope that you have a great weekend!!
Hugs,
Amy
Post Related to:
cards,
Silhouette,
SRM Stickers
Thursday, October 29, 2015
Give Thanks Linen Bag and Tag with SRM Stickers
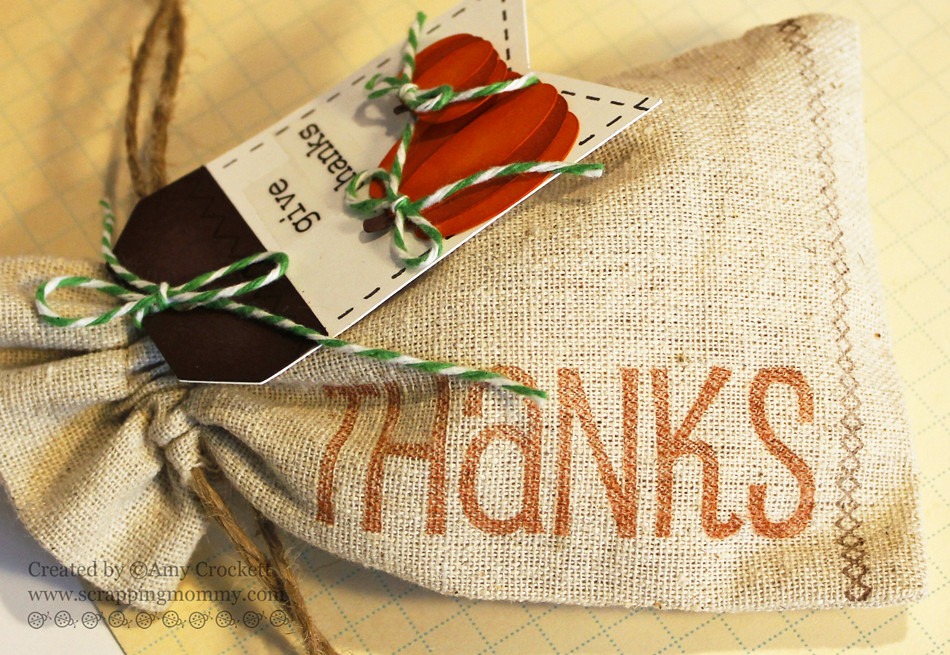
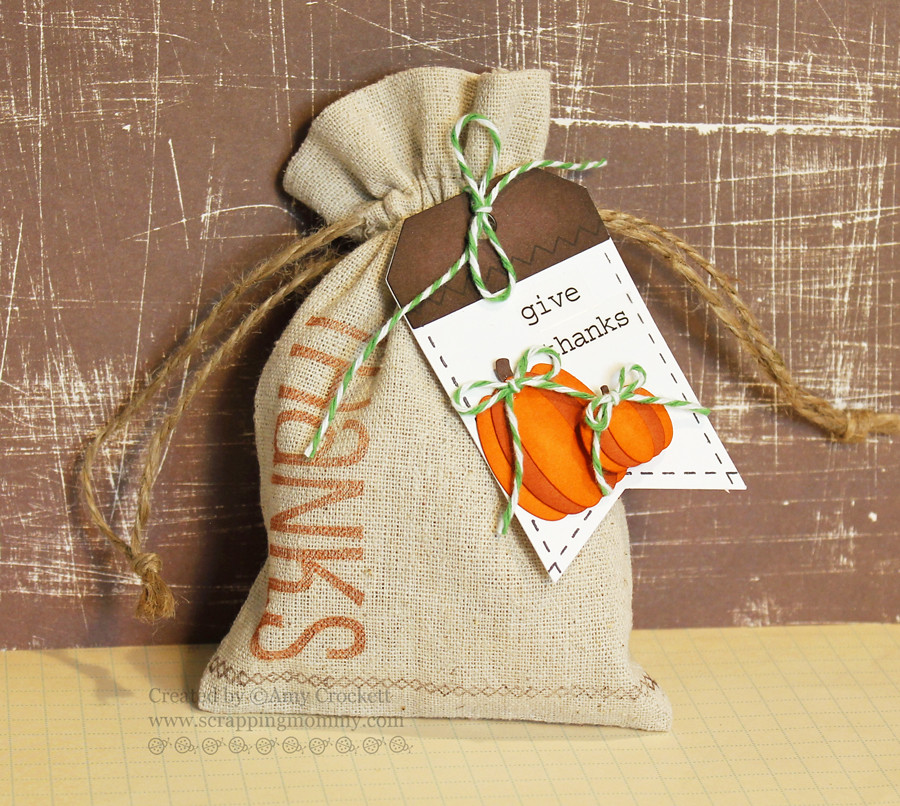
Hello friends!! I have a super cute project to share with you today that is posted over on the SRM Stickers blog today. I decorated this wonderful 3x5 Rustic Linen Bag from SRM Stickers....perfect for fall and Thanksgiving.
I stamped the bag with a "Thanks" the Big Thank You clear stamp set. To get it to stamp on the linen bag, I made sure that the stamp was well saturated with ink and then firmly stamped down and held it for a minute or so to let the ink soak into the fabric. I also added a bit of stitching from the same stamp set along the bottom of the bag.
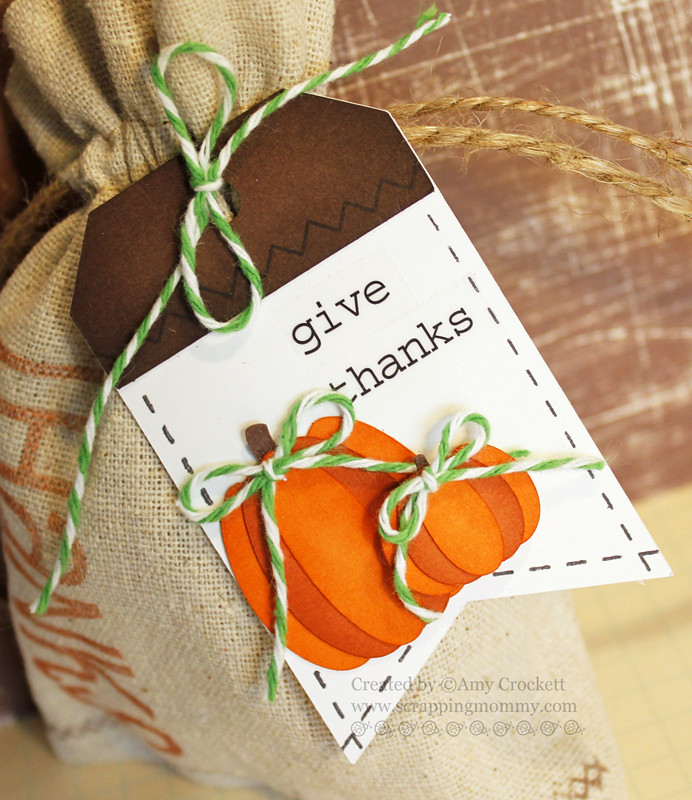
The tag was created from THIS file in the Silhouette store. I also cut the pumpkins from THIS file. I added some stamped stitches along the edges of the tag with the Stamped Stitches clear stamp set. I finished off the tag with some yummy Peapod bakers twine from The Twinery and a sentiment from the Fall Sticker Sentiments.
I would love it if you would leave me a comment below and also on the SRM Stickers blog. Thanks so much for stopping by and don't forget to come back tomorrow to hop with me and the other designers with The Twinery as we show you how we store our yummy bakers twine...there will be some awesome prizes up for gabs.
Hugs,
Amy
I stamped the bag with a "Thanks" the Big Thank You clear stamp set. To get it to stamp on the linen bag, I made sure that the stamp was well saturated with ink and then firmly stamped down and held it for a minute or so to let the ink soak into the fabric. I also added a bit of stitching from the same stamp set along the bottom of the bag.
The tag was created from THIS file in the Silhouette store. I also cut the pumpkins from THIS file. I added some stamped stitches along the edges of the tag with the Stamped Stitches clear stamp set. I finished off the tag with some yummy Peapod bakers twine from The Twinery and a sentiment from the Fall Sticker Sentiments.
I would love it if you would leave me a comment below and also on the SRM Stickers blog. Thanks so much for stopping by and don't forget to come back tomorrow to hop with me and the other designers with The Twinery as we show you how we store our yummy bakers twine...there will be some awesome prizes up for gabs.
Hugs,
Amy
Post Related to:
Gifts,
Misc,
Silhouette,
SRM Stickers,
stamping,
Tags,
The Twinery
Friday, October 16, 2015
Have a Purr-fect Day!
Hello friends!! I have this fun card that was posted over on the SRM Stickers blog a little while ago, but with my move, I didn't have a chance to put it up here. I am working on some fun projects that will get to share with you in the future and also a peek into my new scrapbook room coming up.....you don't want to miss it!
First here is this super cute kitty card that I created with A Cat's Life from Jane's Doodles.
I colored in the image with Copic markers and also added a bit of tone on tone stamping at the bottom of the card with the heart image from the stamp set. I added the patterned paper and then put some Sticker Stitches across it (so much easier than pulling out the sewing machine). Take a closer look at my card....
To finish off the card, I added some ribbon and a button. I think that this super cute card would brighten any cat lover's day....don't you think?
Have a great weekend!!
Hugs,
Amy
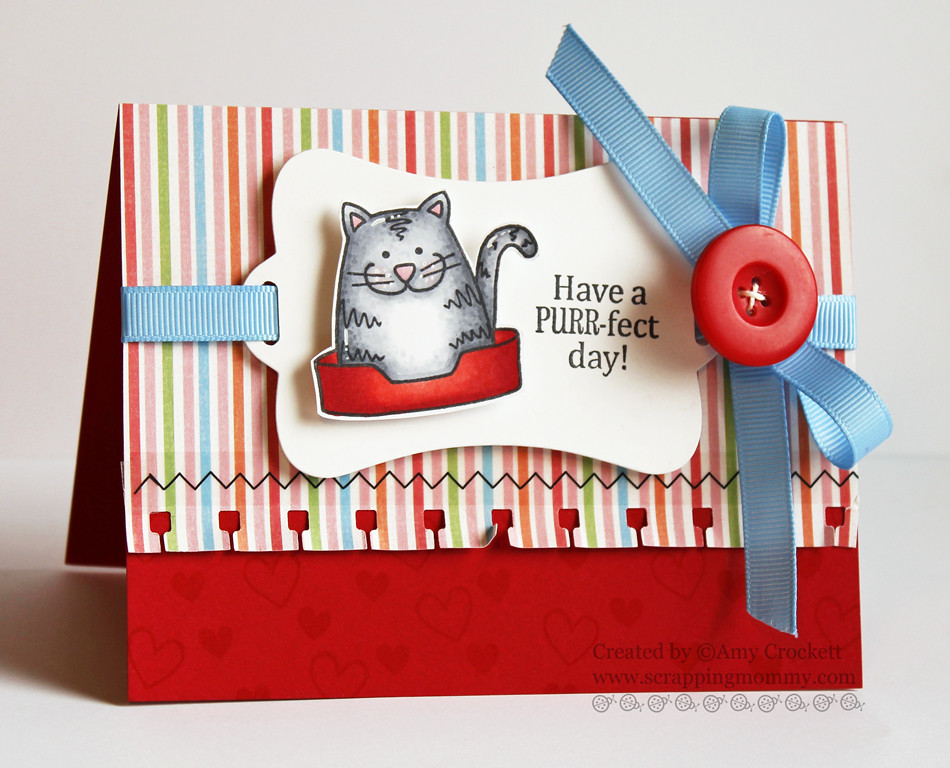
First here is this super cute kitty card that I created with A Cat's Life from Jane's Doodles.
I colored in the image with Copic markers and also added a bit of tone on tone stamping at the bottom of the card with the heart image from the stamp set. I added the patterned paper and then put some Sticker Stitches across it (so much easier than pulling out the sewing machine). Take a closer look at my card....
To finish off the card, I added some ribbon and a button. I think that this super cute card would brighten any cat lover's day....don't you think?
Have a great weekend!!
Hugs,
Amy
Post Related to:
cards,
Copics,
SRM Stickers,
stamping
Thursday, July 23, 2015
Caribbean Twine Spotlight Blog Hop with The Twinery
Hello and welcome to my stop on the Caribbean Twine Spotlight Blog Hop. I am excited that you are joining us today on this fabulous hop and I hope that you will get some great ideas along the way. If you have arrived from Tifany DeGough's blog, you are in the right spot. If you have just happened up on this post and would like to join us, hop on back to The Twinery blog to start at the beginning and to get all the details.
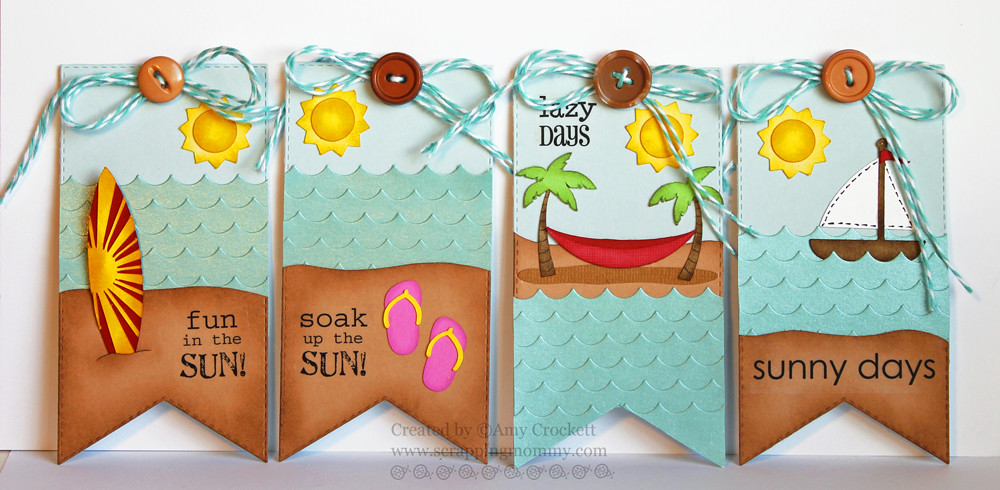
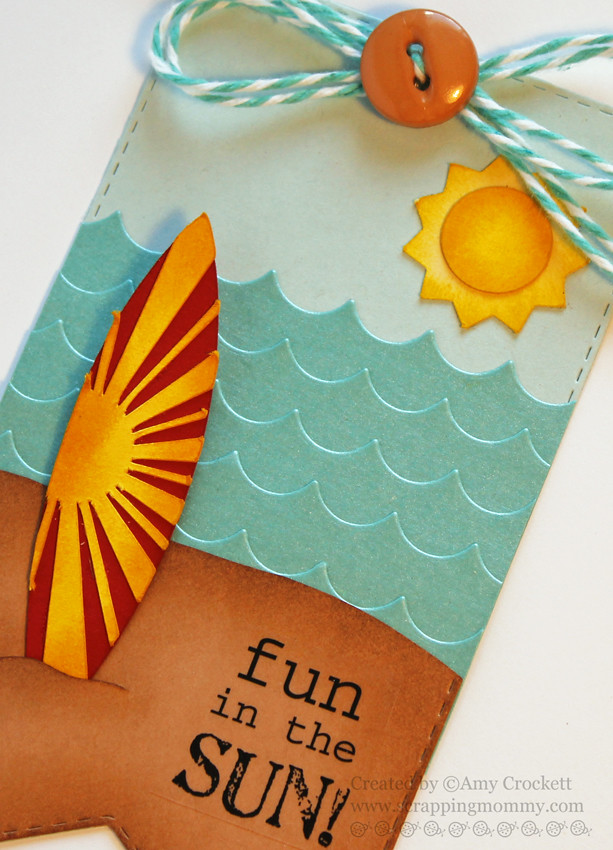
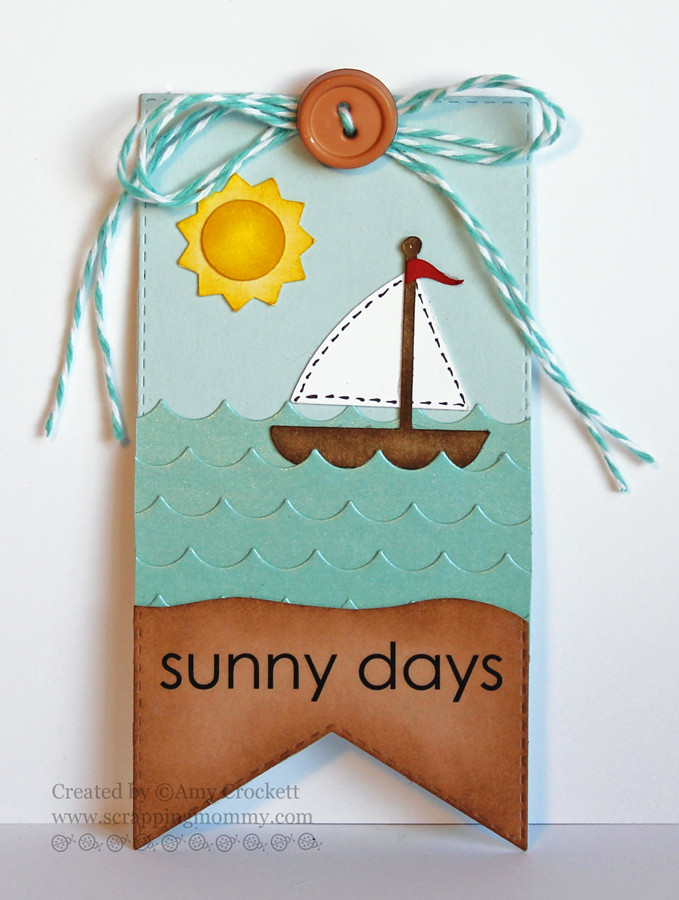
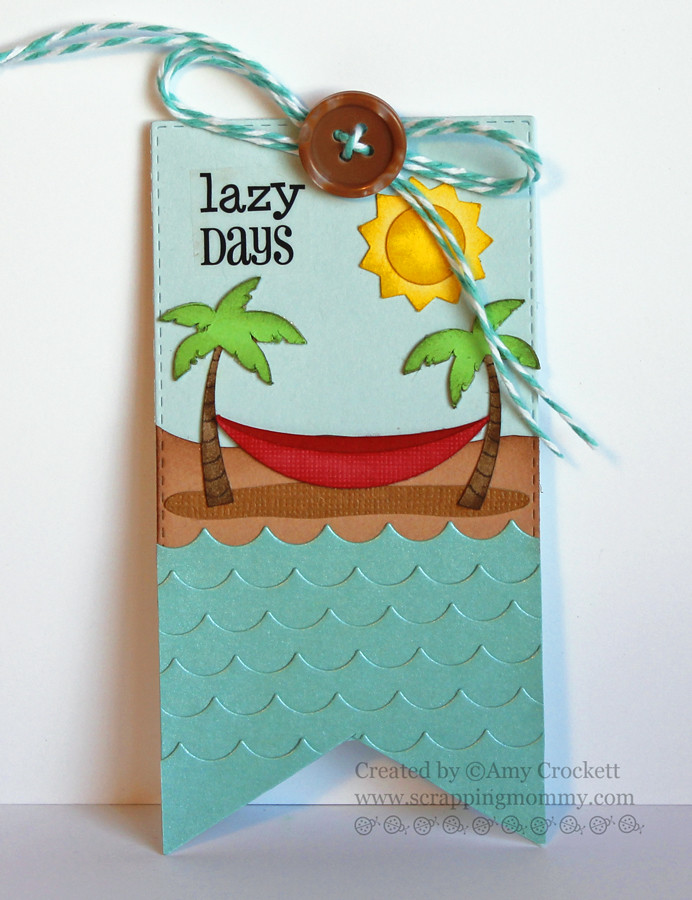
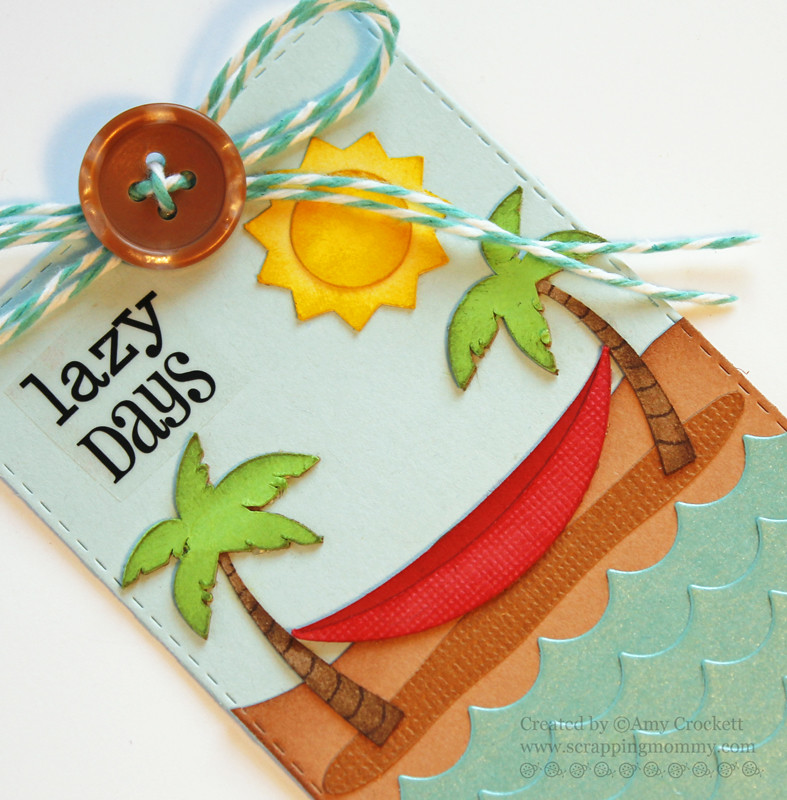
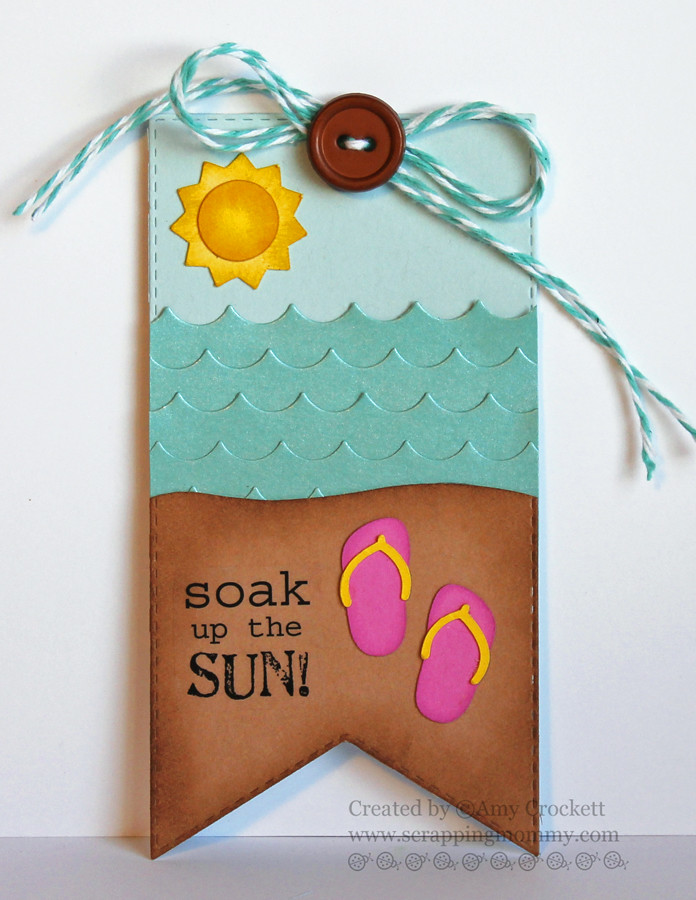
For my project today, I am sharing a set of 4 large tags with a summer/beach theme. Take a look....
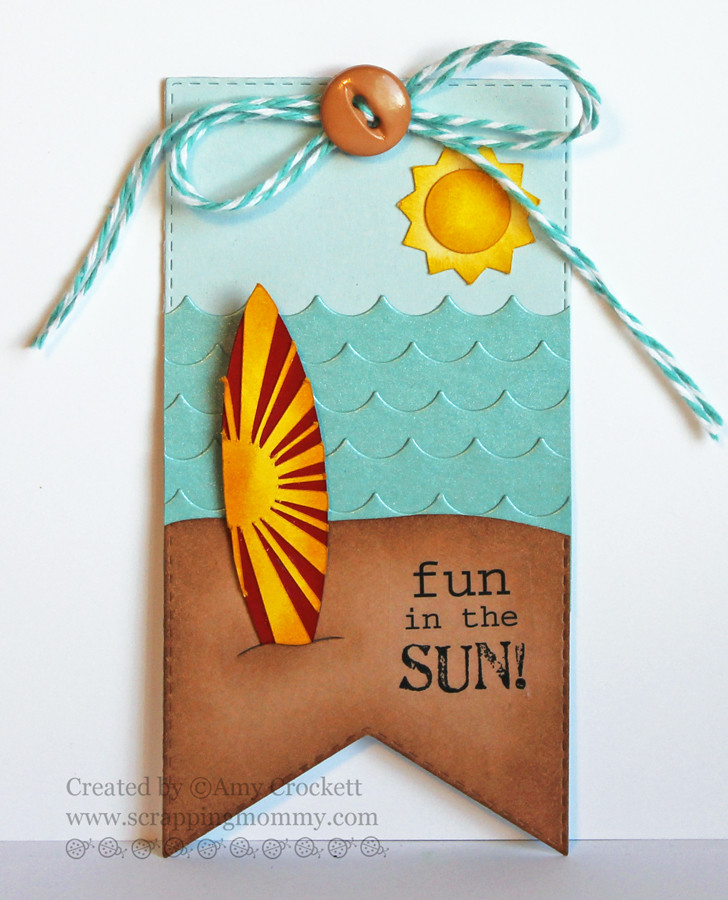
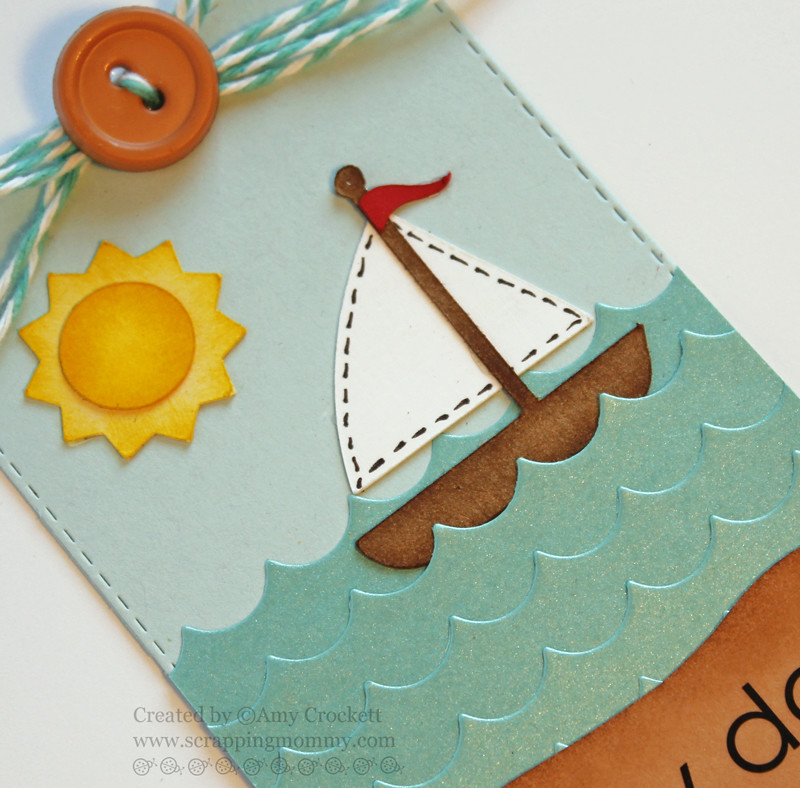
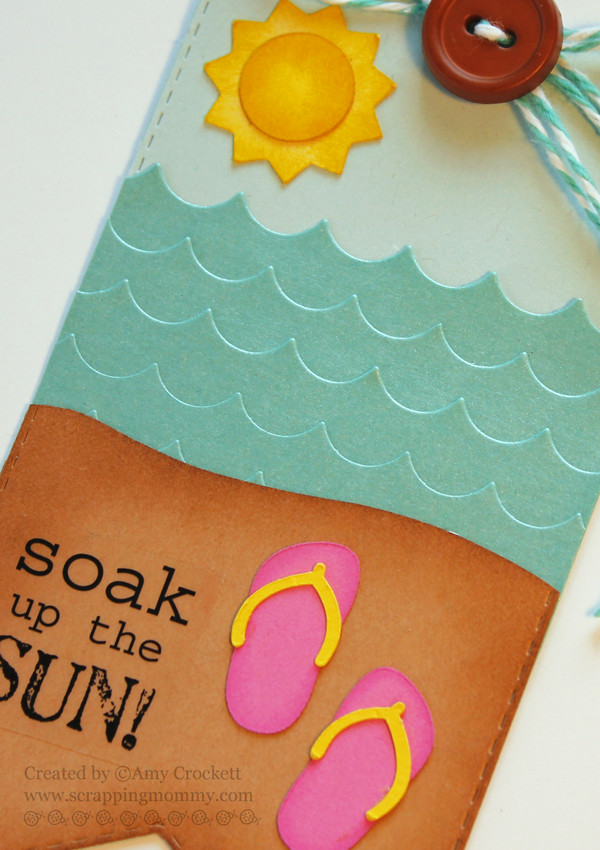
I started with a tag base that I cut from THIS die. I then cut some waves with the negative space from a scallop die. I layered them onto the tags and then added a sandy beach with a light tan cardstock that I inked the edges on. I added a sun and the fun summer themed images on each of them...they were all cut with my Silhouette and from the Silhouette store. I finished them off with some Caribbean bakers twine, a button, and a sentiment from SRM Stickers. Here is a closer look at each of the tags......
Aren't these so fun?? I just love how they turned out.....they are so warm and summery (er...is that even a word?), they make me want to go to the beach right now. :)
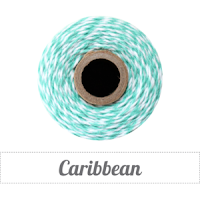
Here are the two beautiful spools of Caribbean bakers twine available in The Twinery Store:
It is now time to hop on over to Jeanne Jachna's blog to check out the wonderful project she has created with the Caribbean bakers twine.
Here is the complete blog hop line-up:
The Twinery
Tifany DeGough
Amy Crockett (you are here)
Jeanne Jachna
DoBea Alberts
Anita Mulcahey
Jennifer Cuthbertson
Tobi Crawford
Stacey Schafer
Denise Hahn
Melyssa Connolly
I hope that you have a great time on the hop. Also, I posted a super fun summer themed layout yesterday on my blog using some Marigold bakers twine.....you can check it out HERE. I also had a guest post on the Paper Sweeties blog earlier today that you can see HERE using some yummy Orchid bakers twine. Thanks for stopping by!!
Hugs,
Amy
For my project today, I am sharing a set of 4 large tags with a summer/beach theme. Take a look....
I started with a tag base that I cut from THIS die. I then cut some waves with the negative space from a scallop die. I layered them onto the tags and then added a sandy beach with a light tan cardstock that I inked the edges on. I added a sun and the fun summer themed images on each of them...they were all cut with my Silhouette and from the Silhouette store. I finished them off with some Caribbean bakers twine, a button, and a sentiment from SRM Stickers. Here is a closer look at each of the tags......
Aren't these so fun?? I just love how they turned out.....they are so warm and summery (er...is that even a word?), they make me want to go to the beach right now. :)
Here are the two beautiful spools of Caribbean bakers twine available in The Twinery Store:
It is now time to hop on over to Jeanne Jachna's blog to check out the wonderful project she has created with the Caribbean bakers twine.
Here is the complete blog hop line-up:
The Twinery
Tifany DeGough
Amy Crockett (you are here)
Jeanne Jachna
DoBea Alberts
Anita Mulcahey
Jennifer Cuthbertson
Tobi Crawford
Stacey Schafer
Denise Hahn
Melyssa Connolly
I hope that you have a great time on the hop. Also, I posted a super fun summer themed layout yesterday on my blog using some Marigold bakers twine.....you can check it out HERE. I also had a guest post on the Paper Sweeties blog earlier today that you can see HERE using some yummy Orchid bakers twine. Thanks for stopping by!!
Hugs,
Amy
Subscribe to:
Posts (Atom)